Apple Retention Messaging API
Enable Apple's retention messaging to reduce churn and improve subscription retention
Apple’s Retention Messaging API is currently available to developers through a pre-release program. Request access from Apple
Apple’s Retention Messaging API allows you show messages to customers who are at risk of canceling their subscription. Retention messages help remind customers of the value of their subscription or present them with alternative options to continue their service.
RevenueCat supports the following message types:
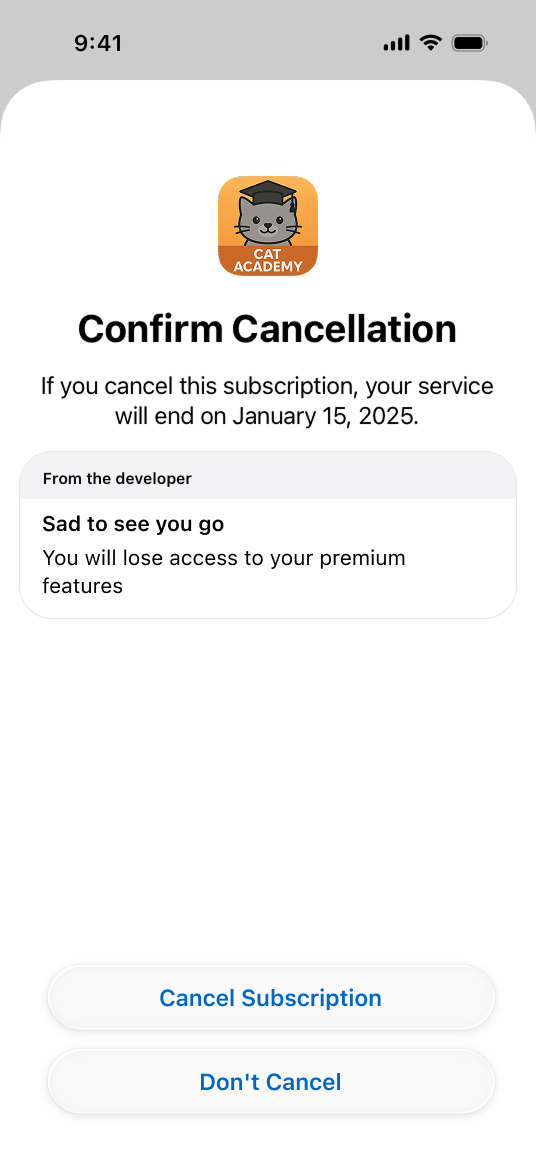
- Text-based message: A simple message highlighting subscription features or benefits.
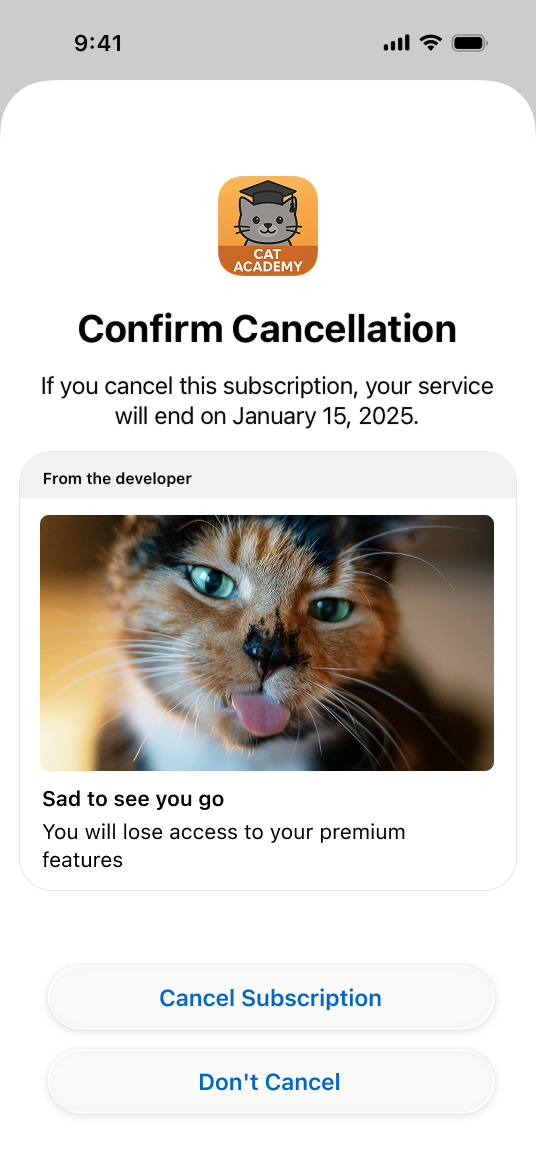
- Text-based message with an image: An image along with a simple message highlighting subscription features or benefits.
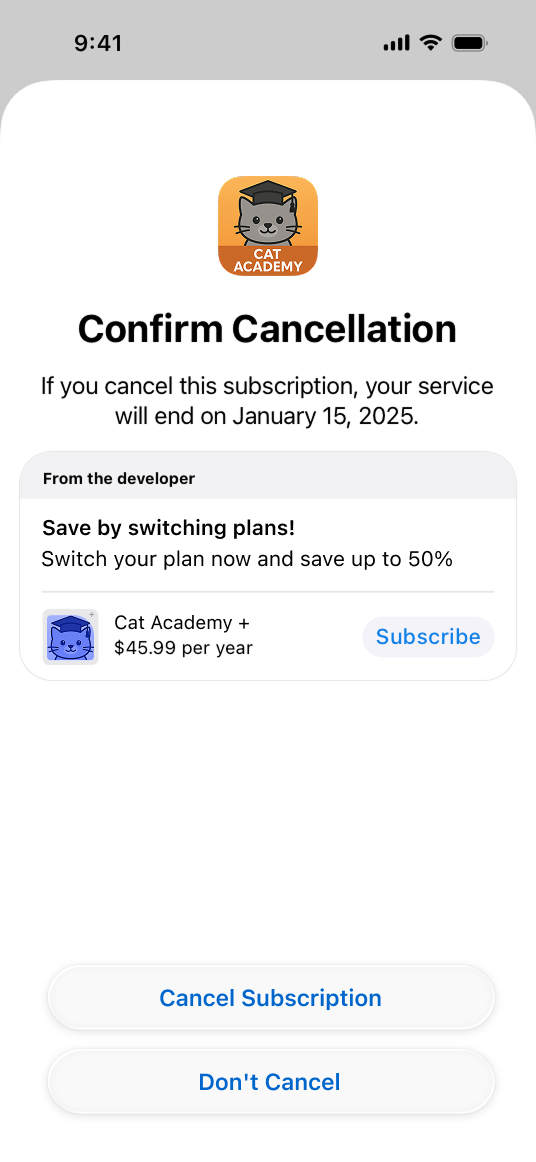
- Switch-plan message: Suggests an alternative subscription plan that the customer could switch to, along with a short message.
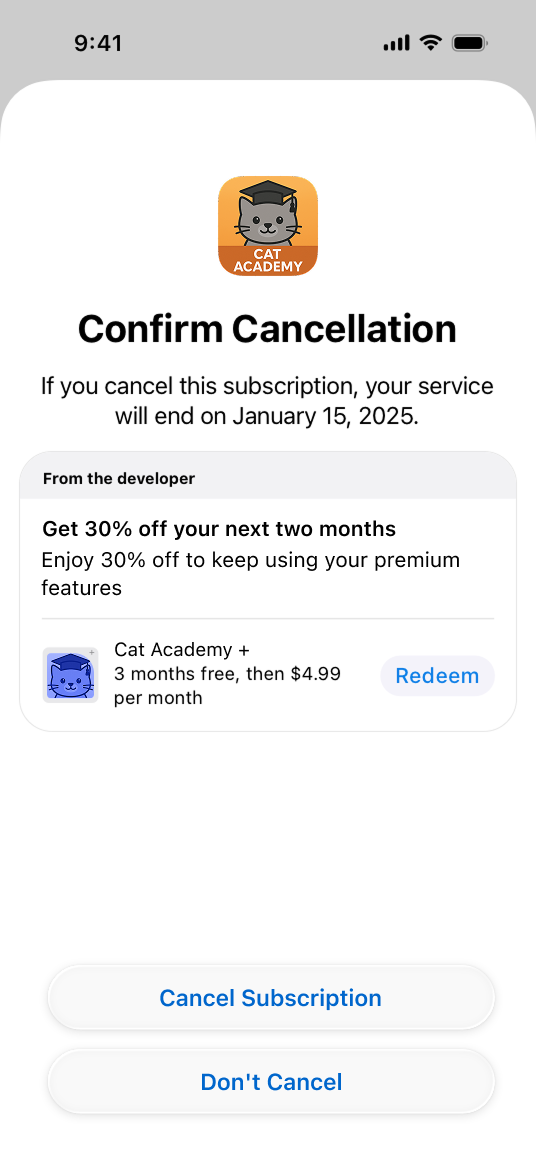
- Promotional-offer message: Offers a discounted price for continuing the subscription, either at the same tier or a different tier of service, alongside a short message.
These messages are shown to customers after they tap Cancel Subscription on the subscription details page. On the Confirm Cancellation screen, customers can either complete the cancellation, tap Don’t Cancel, or, depending on the message, redeem an offer or switch to a suggested product.
Retention messages are visible only to devices running iOS 15.1 or later, iPadOS 15.1 or later, visionOS 1 or later, or macOS 14 or later.
Prerequisites
Before you can configure retention messages, you’ll first need to request access from Apple.
- Navigate to the Apple's form. Only the account holder can fill out this form.
- Fill out the form with the following details:
- App Name: Enter the name of your app.
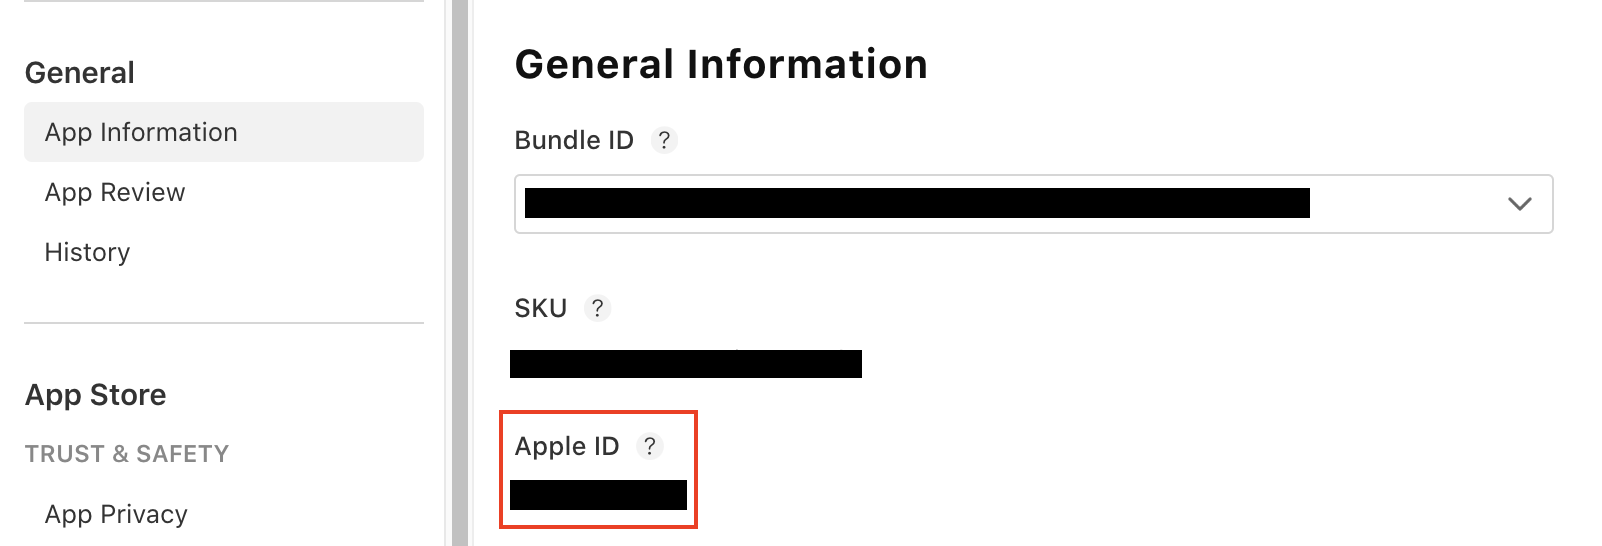
- Apple ID: You can find your Apple ID in App Store Connect under "App Information".
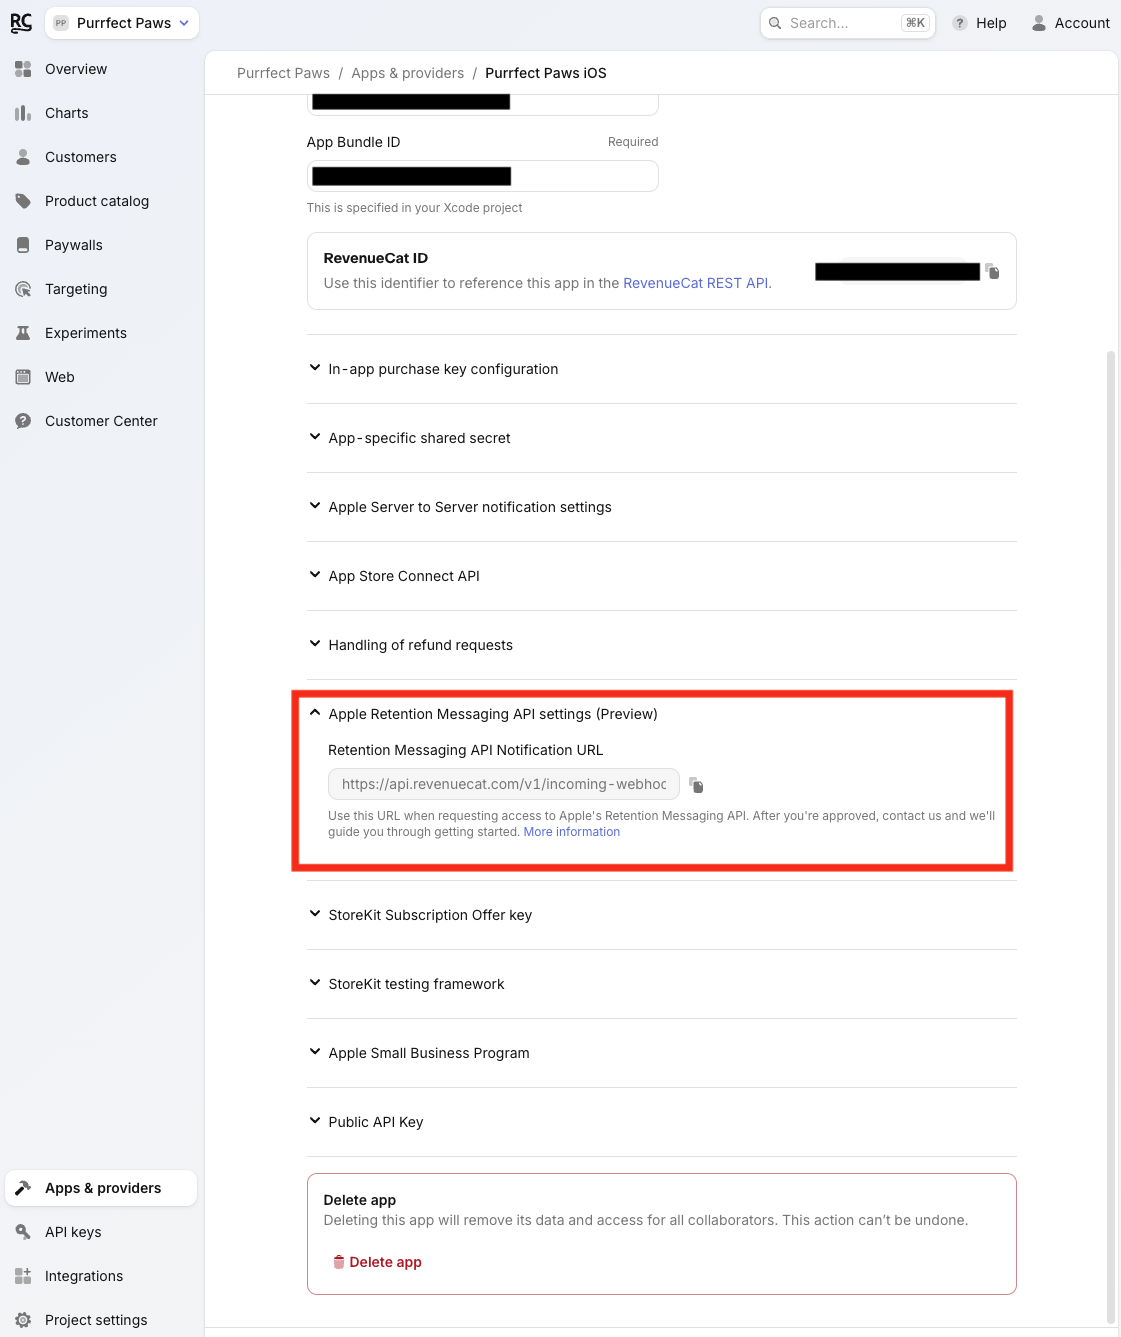
- Endpoint URL: You can find this URL in your RevenueCat dashboard on the App Store app’s settings page.
- On the form, make sure to select "My app currently has a subscription on the App Store."
- Submit the form and wait for Apple's approval
- Apple will notify you once your request has been approved
Retention messages can be configured and shown without Apple App Store Server Notifications, but RevenueCat's retention messaging charts require those notifications to report accurate analytics.
Configuration
Before you can configure your messages in sandbox, you’ll need to complete a few setup steps to connect your app and verify your integration. This section will guide you through each step.
Navigate to Apple's Retention Messaging API settings page by going through the sidebar 'Lifecycle' > 'Retention'.
Connecting your sandbox URL


Configure your sandbox realtime URL so RevenueCat can receive sandbox notifications from Apple.
If you already have an existing sandbox URL, we will prompt you replace the existing URL.
Run a performance test

Before being able to start configuring messages, we need to run a performance test. To start the test, you'll need an active transaction from either:
- a sandbox purchase, or
- a TestFlight purchase
See our Apple App Store & TestFlight documentation for instructions on creating a test transaction.
The test may take up to 1 hour to complete. Make sure the transaction remains active during the test. We recommend using a product with the longest available duration, as the test can fail if the subscription expires before completion.
Transactions created using StoreKit Configuration files (.storekit) will not work for the performance test.
You must create a sandbox or TestFlight transaction.
Once the performance test has started, you can begin configuring your sandbox messages while it runs. Alternatively, you can wait for the test to complete and proceed with setting up your production URL. We recommend testing your messages in sandbox first before moving to production.
If the performance test fails, you'll need to trigger it again manually.

Create your first message
Once your sandbox URL is configured and the performance test has started, you can begin creating messages in sandbox.
For each product you offer, you'll need to consider whether you'll want to show a message in the confirm cancellation screen or not, and whether you'll show a promotional offer or an alternate product.
Every product needs to be configured with a default message that will be displayed as a fallback in case the realtime message with the promotional offer or alternate product fails.
The text displayed to customers is static and needs to be pre-approved by Apple. This means it needs to be generic and not contain any user-specific information. The promotional offer or alternate product can be selected dynamically.
RevenueCat allows you to configure both in Sandbox or Production. We recommend starting with sandbox to test before moving your messages to production. See sandbox vs production for more information.
Creating a default message
In order to configure promotional-offer or switch-plan message, you'll need to first configure a default message to act as a fallback message.
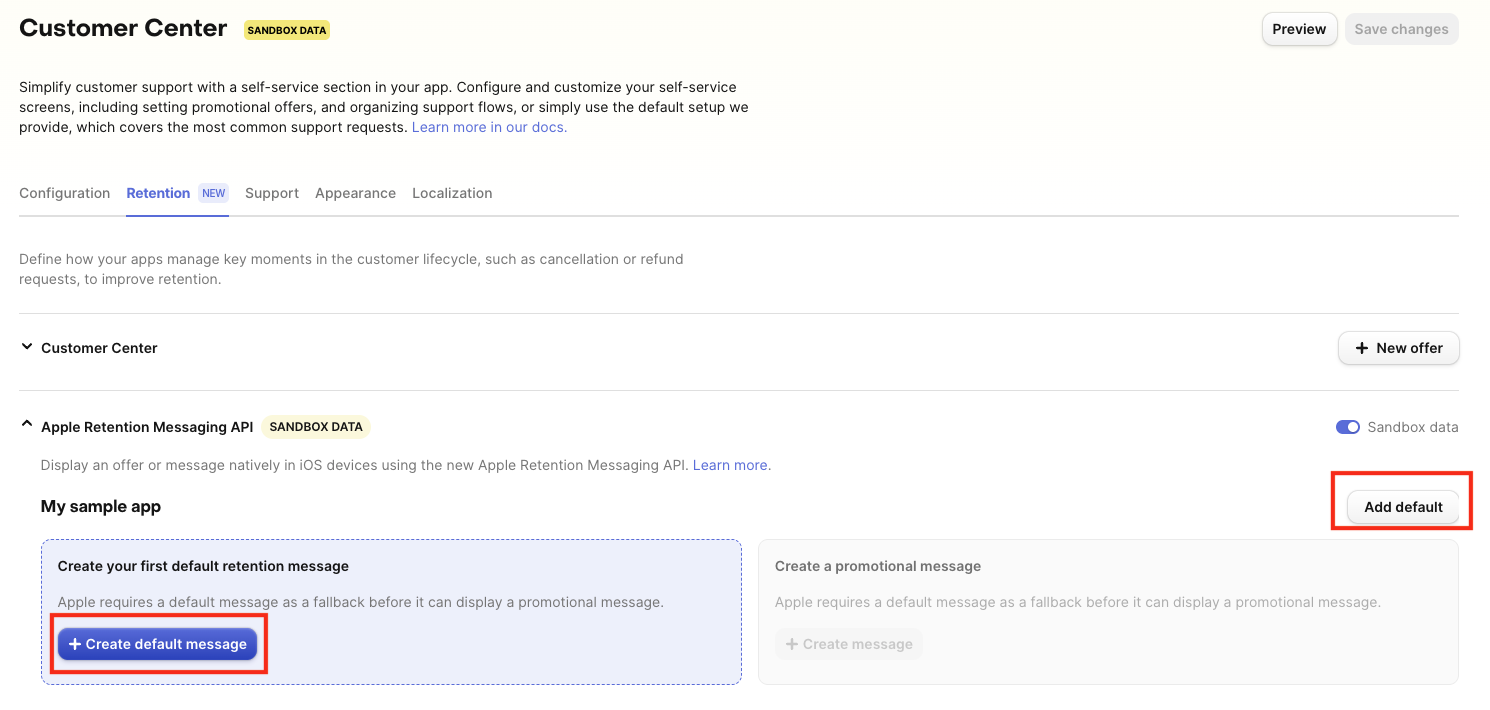
- Go to Lifecycle → Retention page
- Find your app in the Apple Retention Messaging API section
- Select the Add default button (or + Create default message if no messages exist)
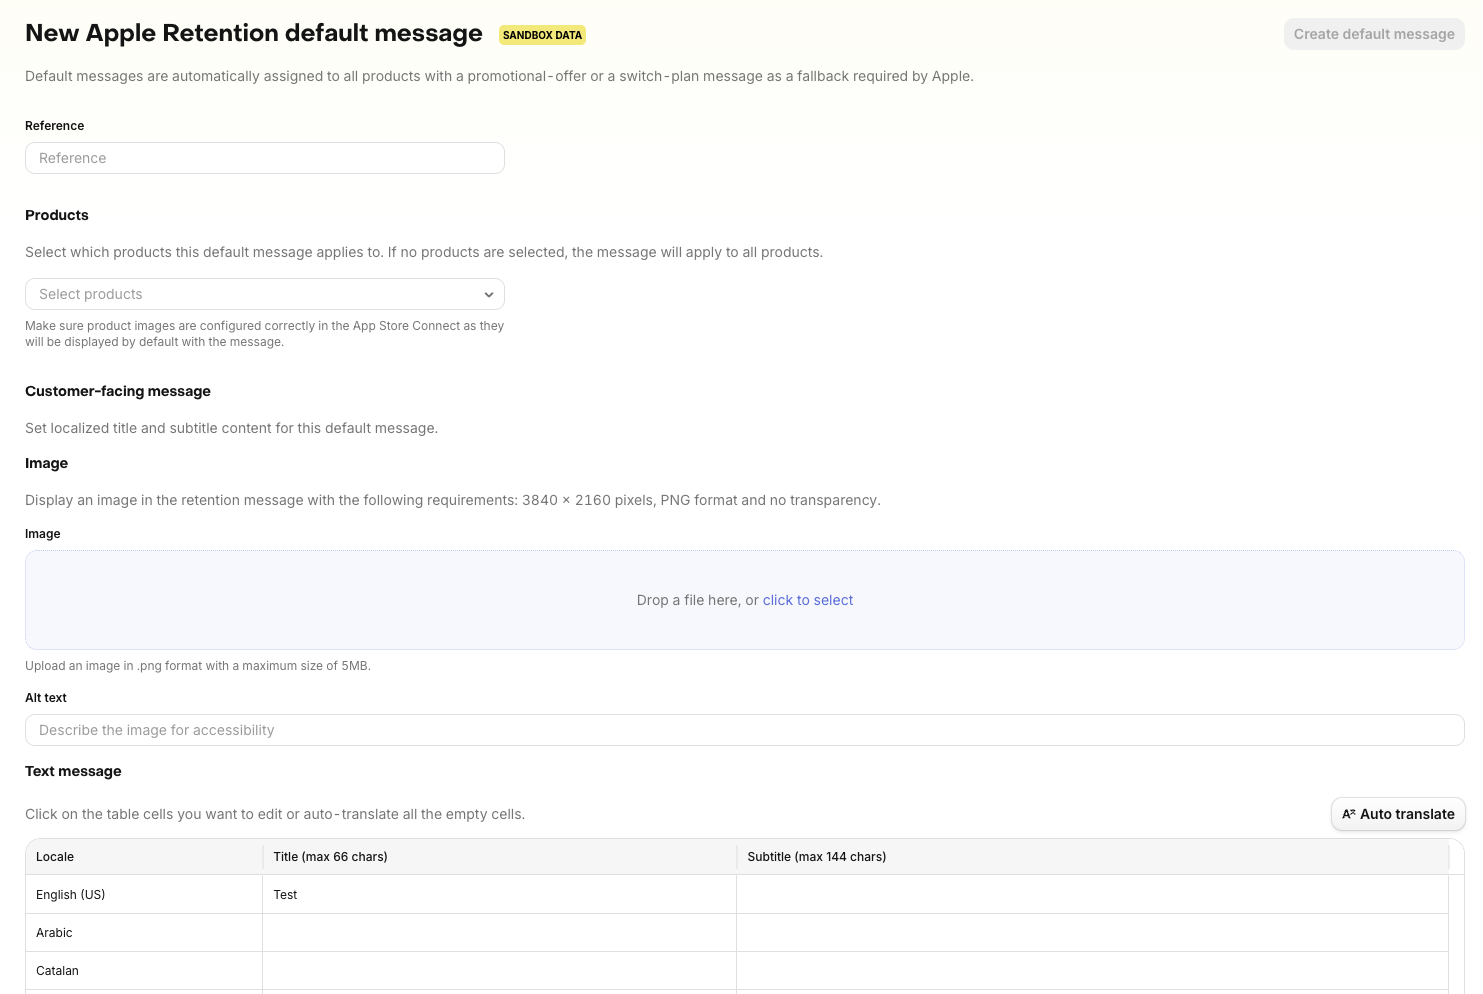
- Reference: Enter a descriptive name for this message (for your internal reference)
- Products: Select which products this default message applies to
- You can select multiple products
- These products should be overlapping with the products you're planning on configuring for either your promotional offer or switch-plan message
- Customer-facing message: Add messages for each locale you want this default message to be enabled for. For each locale, provide:
- Title: The main message title (displayed prominently). Max length 66 characters
- Subtitle: The detailed message text. Maximum length 144 characters
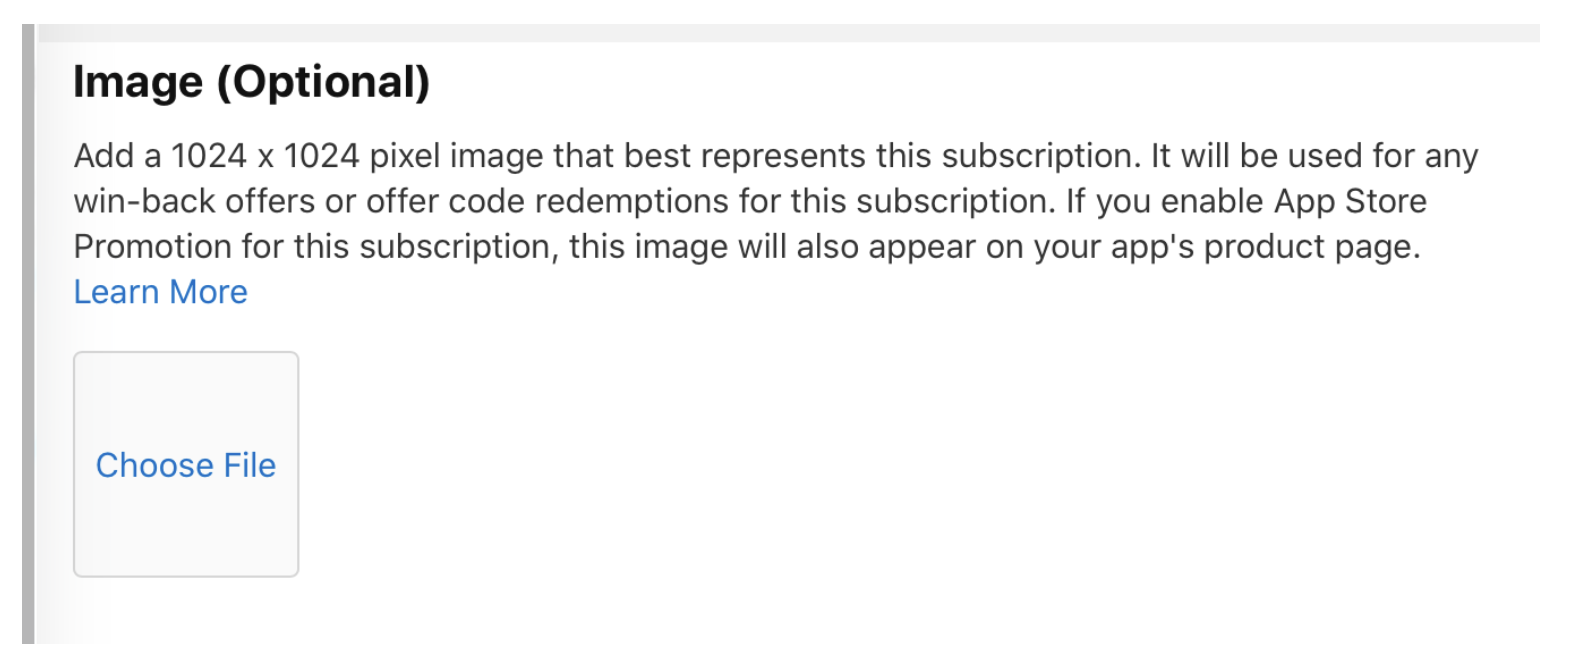
- Image (optional): An optional image to display alongside your message. 3840 × 2160 pixels, PNG format and no transparency
You can also select Auto translate to utilize RevenueCat's translation feature. This will automatically translate empty locales from the English (United States) text. It only fills missing cells and will not overwrite existing translations.
- Product images are automatically pulled from App Store Connect
- Ensure your product images are properly configured in App Store Connect
- Messages must be approved by Apple before they can be displayed
- Select Save to create your default message. The message will then be automatically submitted to Apple for review.
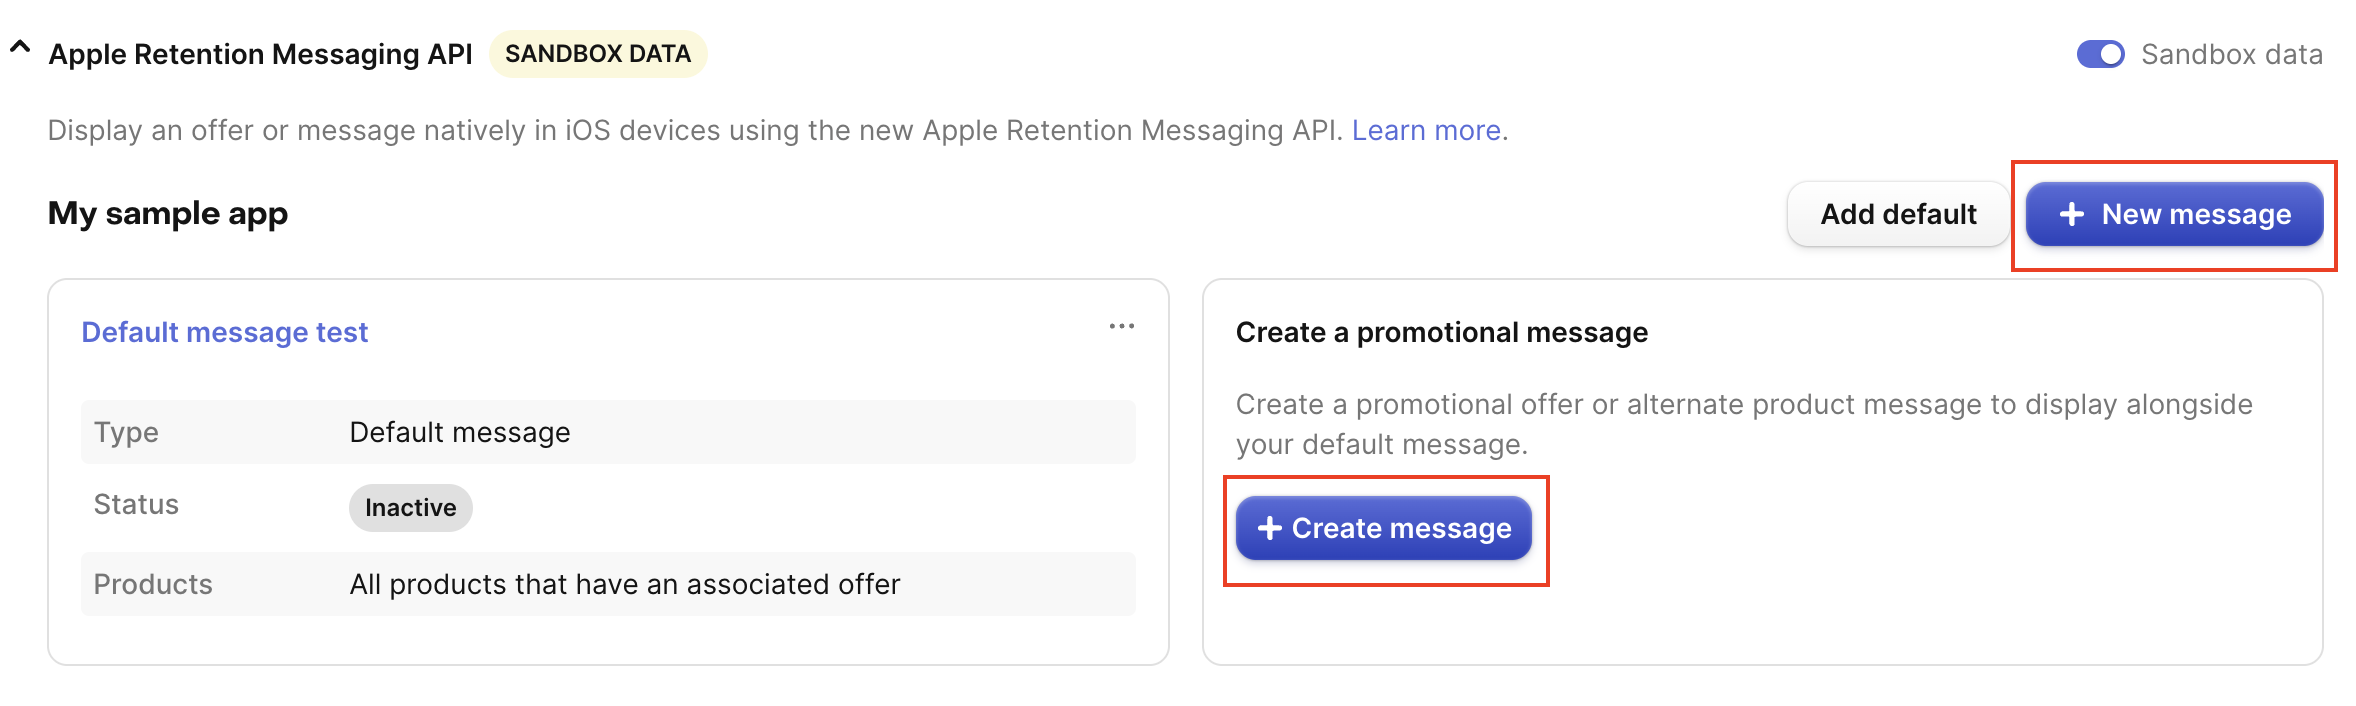
Creating a message
Be sure that you have at least one default message created before creating a promotional-offer or switch-plan message.
- Go to Lifecycle → Retention page
- Find your app in the Apple Retention Messaging API section
- Select + New message or the + Create message button (only selectable after a default message exists)
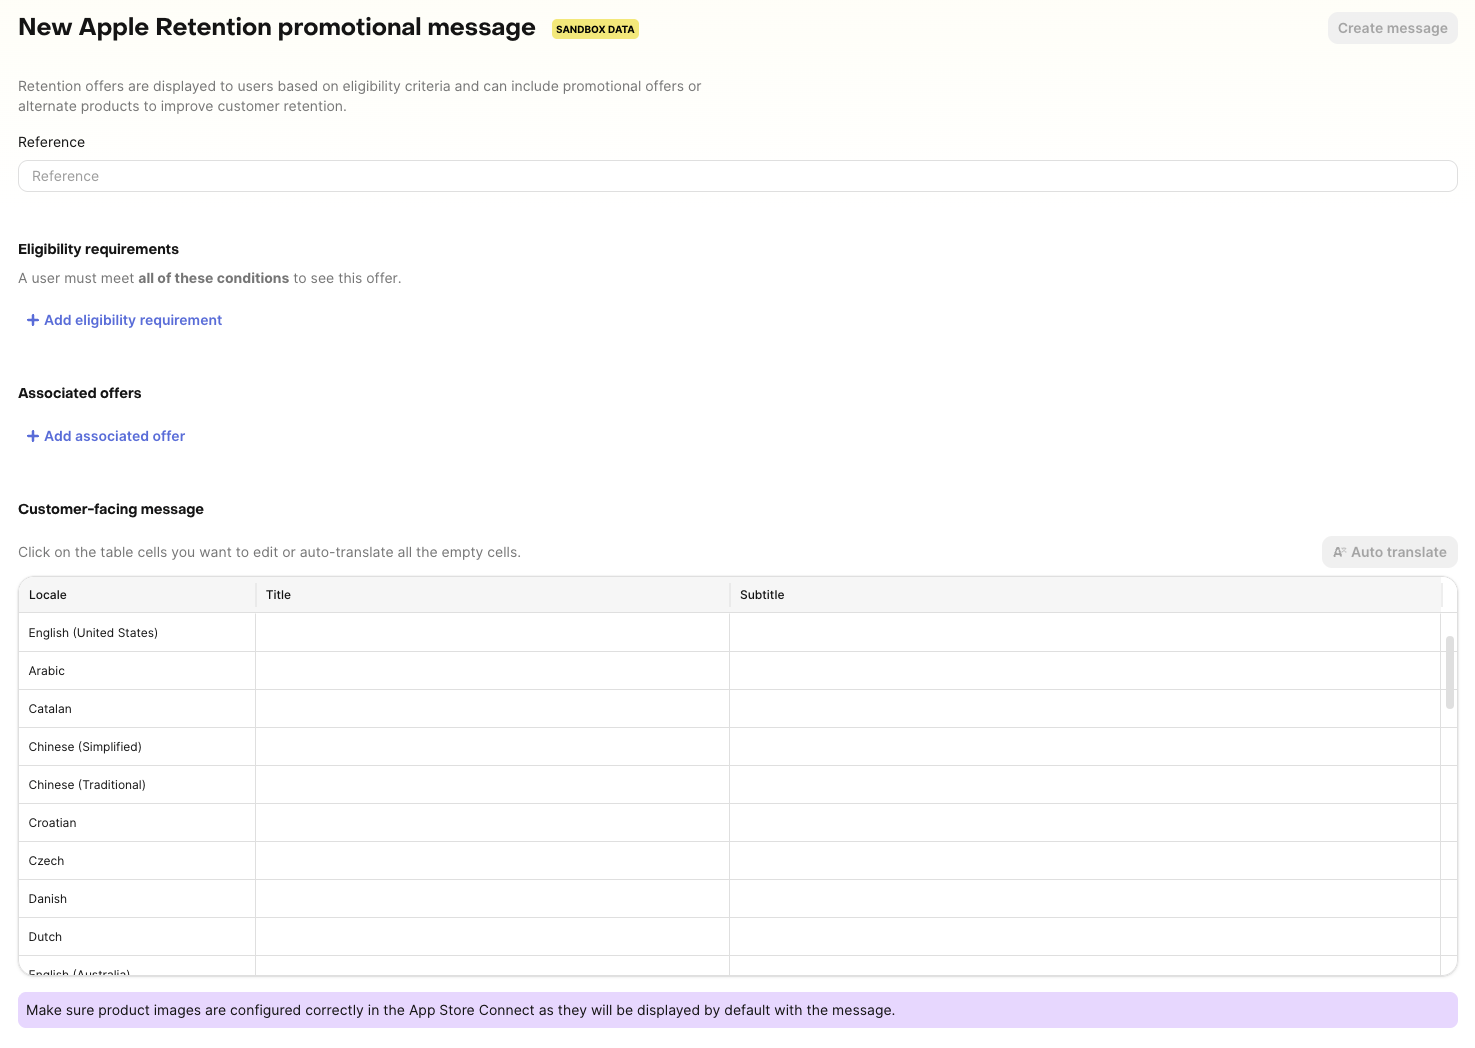
- Reference: Enter a descriptive name for this message (for your internal reference)
- Eligibility requirements (optional): This is an optional setting where you can have custom targeting. We currently offer the following eligibility criteria:
- First seen more than N days ago
- First purchase more than N days ago
- Has not redeemed an offer in the last N days
- Storefront in list
- Is in intro offer period
- Is in free trial
- Random sample
You can add multiple eligibility rules. All rules must be satisfied for the message to be shown. For customers that are not eligible, they will be shown the default message instead.
"Is in intro offer period" and "Is in free trial" are separate states. A customer in a free trial is not in an introductory offer period, because the App Store tracks introductory price offers and free trials separately. To target customers cancelling during a free trial, use "Is in free trial" rather than "Is in intro offer period".
Add one or more associated offers that will be presented with this message.

- Associated offers: This is the main differentiation between whether your message will be a promotional-offer, switch-plan, or text-based message.
- Active product: This is the product the customer currently has
- Offered product: Select the product that you want to present to the customer (the product that you want to suggest switching to)
- Leave blank if you're creating a text-based message
- Promotional offer: Select the promotional offer you'd like to offer to the customer
- Leave blank if you're creating a switch-plan plan (no promotional offer)
You can add multiple associated offers. Make sure that the customer-facing message would be appropriate for all offers configured on the same page.
- Customer-facing message: Add messages for each locale you want this message to be enabled for. For each locale, provide:
- Title: The main message title (displayed prominently). Max length 66 characters
- Subtitle: The detailed message text. Maximum length 144 characters
You can also select Auto translate to utilize RevenueCat's translation feature. This will automatically translate empty locales from the English (United States) text. It only fills missing cells and will not overwrite existing translations.
Messages must be approved by Apple before they can be displayed
- Select Save to create your message. The message will then be automatically submitted to Apple for review.
Connecting your production URL

Once the performance test has successfully passed, you can configure your production realtime URL. This enables RevenueCat to receive production notifications from Apple. If you already have an existing production URL, we will prompt you to replace the existing URL.
After your production realtime URL is configured, you can begin setting up your production messages.
To do this:
- Turn off the Sandbox Data toggle in the dashboard
- Create your messages for the production environment
Messages created in sandbox will not carry over to production. You’ll need to recreate them.
Managing messages
Viewing messages
- Go to Lifecycle → Retention page
- Find your app in the Apple Retention Messaging API section
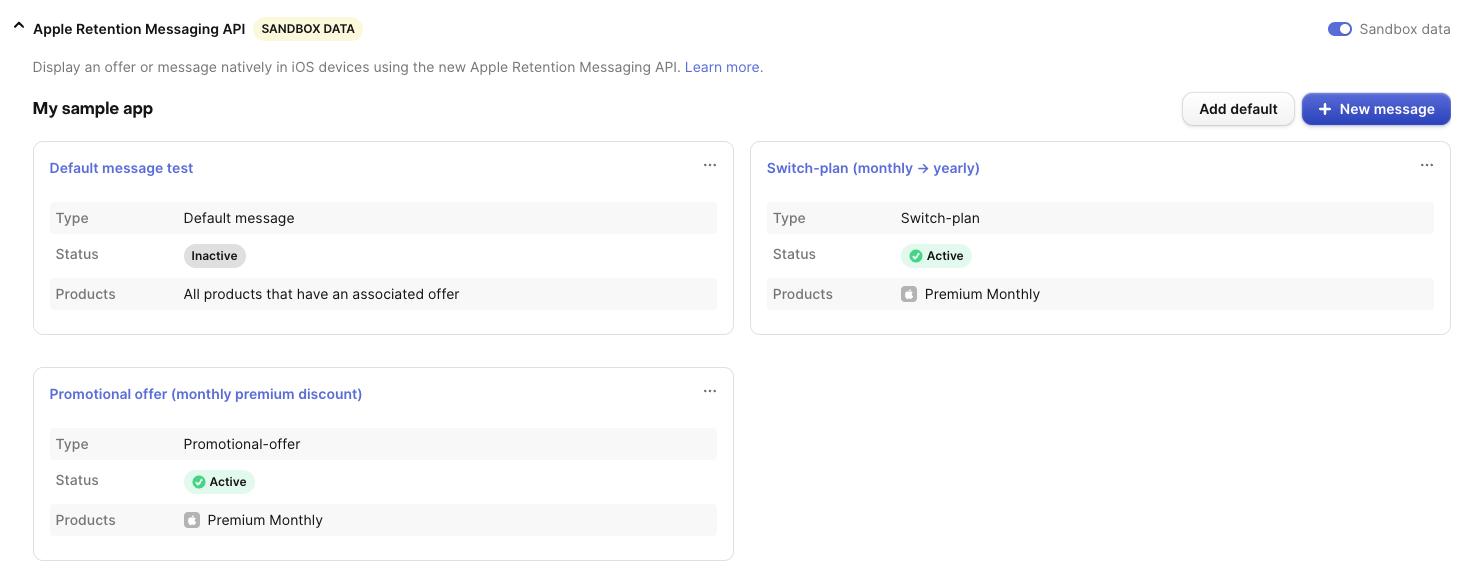
- All messages are displayed as cards showing:
- Reference name
- Type: Default message, Promotional-offer, or switch-plan
- Status: Active, Inactive, or review statuses
- Products: Which active products the message applies to
Message Status
Messages can have the following statuses:
- Active: Message is enabled and all locale messages are approved by Apple
- Inactive: Message is disabled
- Active, with messages in review: Some locale messages are pending Apple's approval
- Active, with rejected messages: Some locale messages were rejected by Apple. You should review the rejected messages and submit a new message for the rejected locale.
Messages are reviewed per locale, so different locales may have different approval statuses.
Sandbox vs production
The Retention Messaging API supports both sandbox and production environments:
- Sandbox: Use for testing your messages before going live
- Messages are approved instantly, making it easier for you to test configurations without affecting production
- Production: Use for live messages shown to actual customers
Using the Sandbox Mode Switch
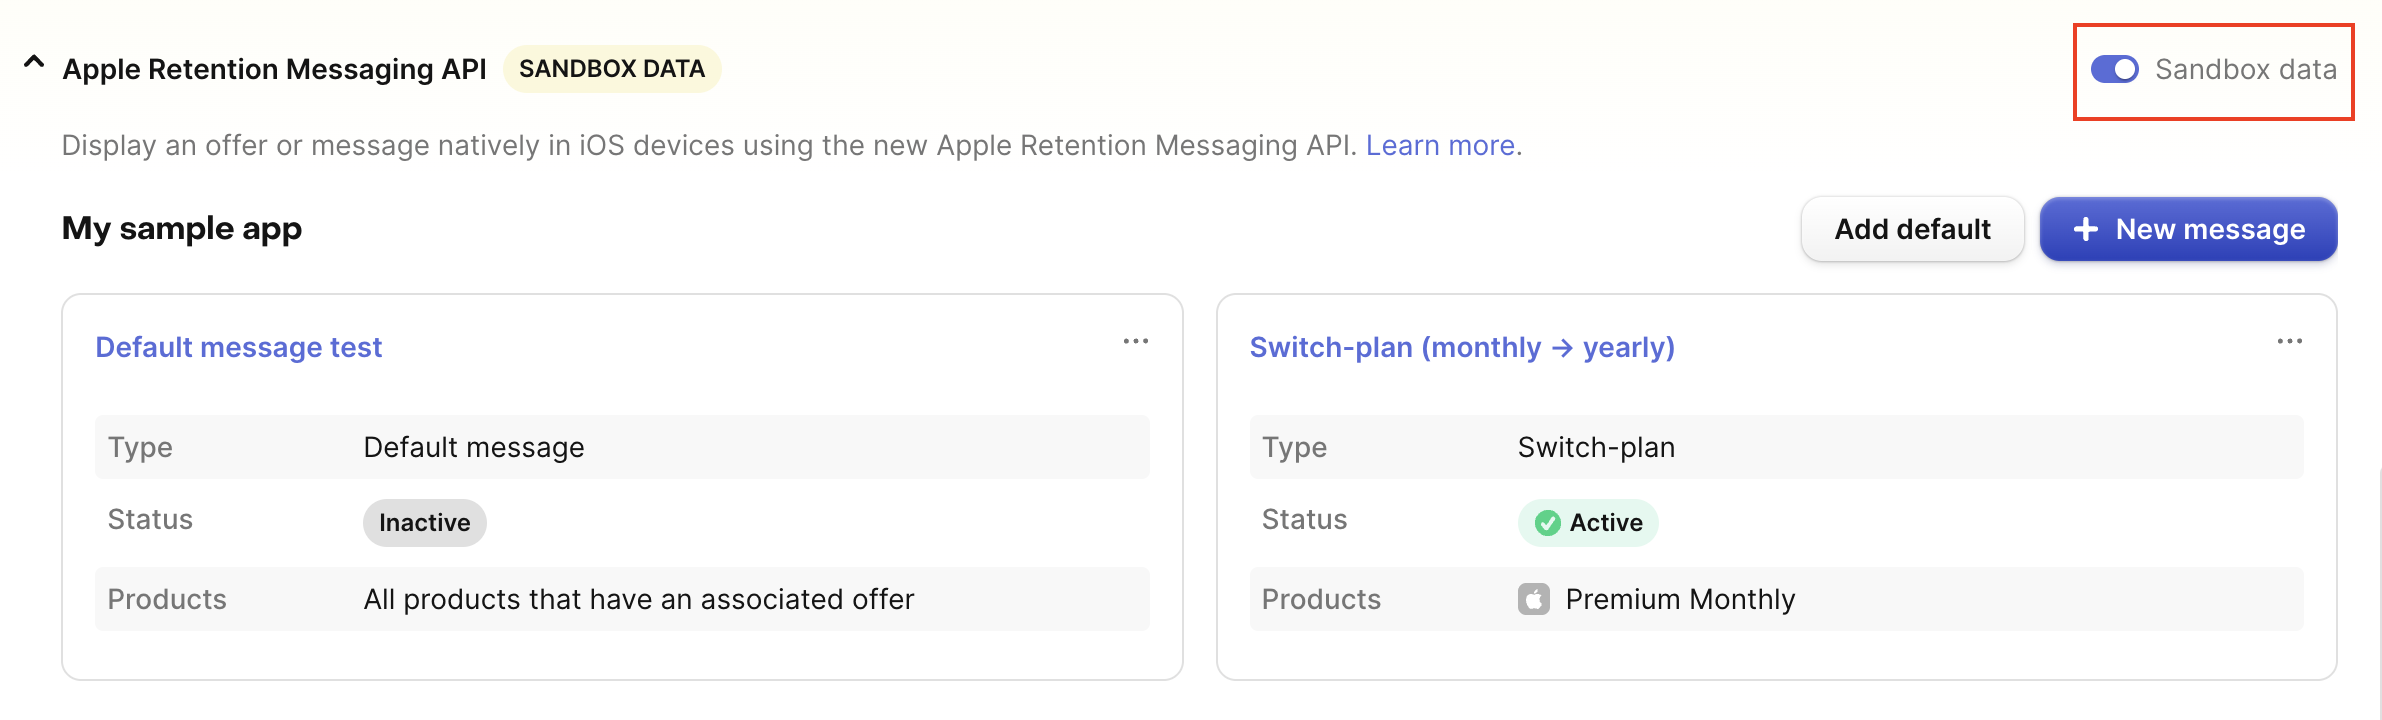
The sandbox mode switch is located in the Apple Retention Messaging API section header, in the top-right corner of the collapsible panel. When enabled, you'll see a "SANDBOX DATA" badge next to the section title
What the switch does:
- When OFF (Production mode): Shows and edits production retention messaging configurations
- When ON (Sandbox mode): Shows and edits sandbox retention messaging configurations
- All messages, configurations, and data displayed will be from the selected environment
Testing with TestFlight
We recommend using a TestFlight build of your app. Make sure you have a button to open the “manage subscriptions” sheet from inside your app so you can test the cancellation flow. Remember subscription renewal date is 1 day regardless of the subscription period of the product you purchased.
To test with a more accelerated renewal rate, you can use your Sandbox account in TestFlight. Check Apple’s documentation on how to set up your device.
You must have a button in your TestFlight app to open up the "manage subscriptions" sheet, otherwise you will not be able to see the Confirm Cancellation screen. Please see our SDK reference for more information.
Alternative: Sandbox testing (without TestFlight)
You can also test by running your app directly from Xcode using a sandbox Apple ID on a device or simulator.
StoreKit Configuration files (.storekit) cannot be used for this type of testing.
Best practices
- Start with simple rules: Begin with basic eligibility criteria. This would be important unless you already have existing sandbox customers that will meet your eligibility criteria.
- Test all locales: Ensure messages work correctly in all target languages
- Verify product associations: Make sure promotional offers and alternate products are correctly linked
Important:
- Sandbox and production configurations are completely separate
- Messages must be configured and approved separately for each environment. Sandbox messages are typically approved instantly.
- Changes made in sandbox mode do not affect production configurations
- When you're ready to go live, recreate your messages in production mode
Activate/deactivate messages
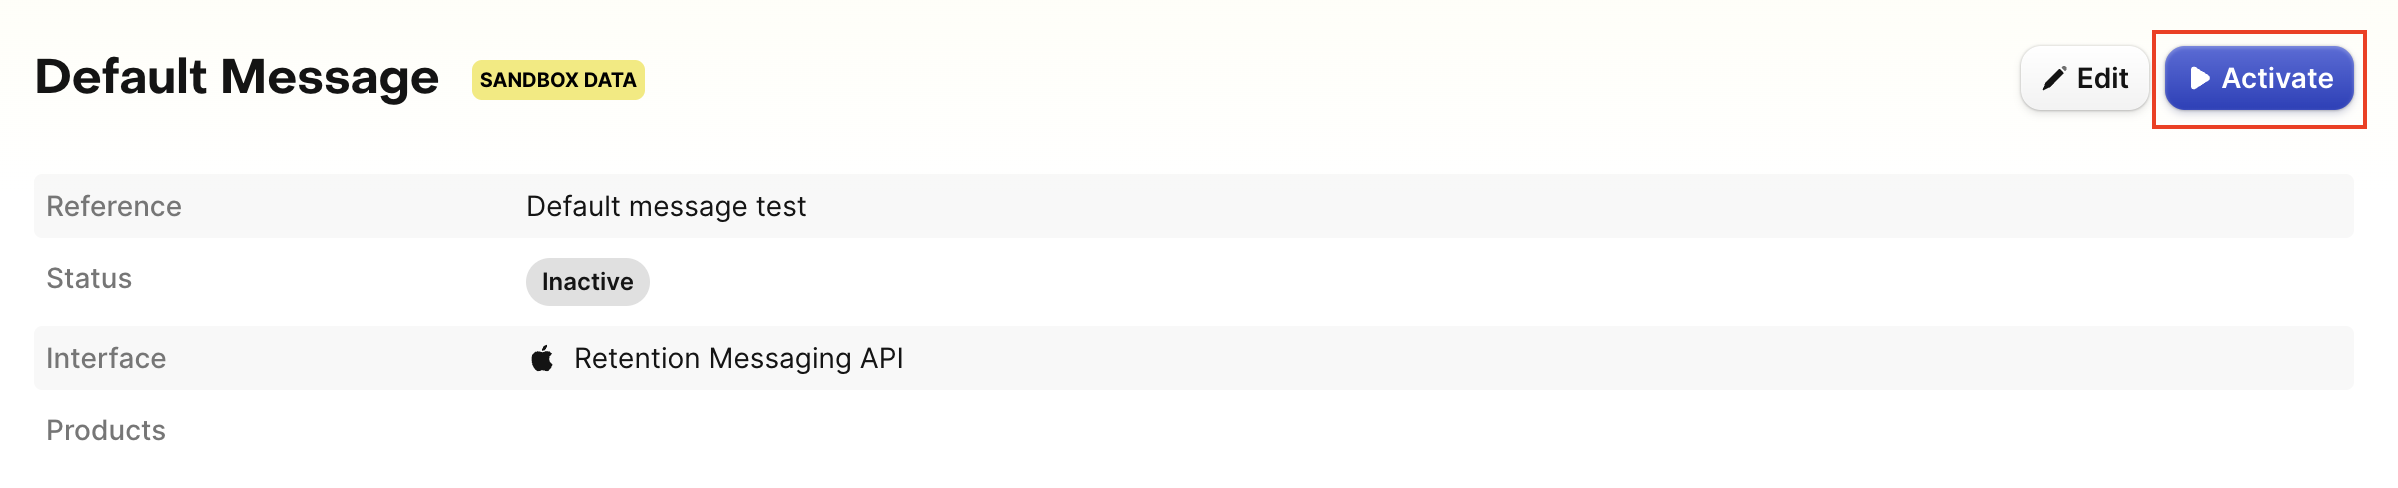
Under each message type, you can use the activate/deactivate button in the upper right to enable or disable messages. Inactive messages won't be displayed to customers.
Discrepancies
If you are seeing a discrepancy between Apple’s metrics and RevenueCat’s, this is expected due to differences in how each platform calculates exposures and saves.
RevenueCat will typically report a higher number of saves because it attributes a save whenever a customer remains subscribed or cancels after being exposed to the cancellation flow. In contrast, Apple appears to count a save only when the customer explicitly dismisses the cancellation screen. For example, if a customer simply closes the app without completing the flow, RevenueCat may still attribute a save, whereas Apple may not.
RevenueCat also tends to report a higher number of exposures. RevenueCat counts any cancellation flow request that is received, even if the flow is ultimately not displayed to the customer. Apple, on the other hand, counts a page view only when at least 50% of the cancellation sheet has loaded and been displayed.