Set up Single Sign-On (SSO) for RevenueCat
This guide walks you through enabling and configuring Single Sign-On (SSO) for your RevenueCat account.
SSO is currently available for customers on an Enterprise plan.
How SSO works in RevenueCat
- Once SSO is enabled, users with your organization’s email domain will be required to sign in to RevenueCat through SSO.
- SSO is enforced at the account/organization level for the configured email domain.
What you’ll need before you start
Roles
- Someone on your team who can manage your identity provider (for example, configuring SAML/OIDC and SCIM).
Identity provider requirements
Your identity provider must support:
- SAML or OpenID Connect (OIDC) for authentication, such as Okta, Azure AD, Google Workspace, AWS Cognito, etc.
- SCIM provisioning for directory sync
Step-by-step: Enable SSO
1) Request SSO enablement
Contact your RevenueCat account manager to request SSO enablement for your organization.
2) Configure Your Identity Provider
Once SSO has been enabled for your organization, navigate to your Account > Security > SSO settings and click Manage SSO Connection.
This will open the WorkOS Admin Portal where you can configure your SAML or OIDC identity provider settings.
Configure your identity provider details and test the connection in the WorkOS portal. Once complete, you'll be redirected back to the RevenueCat Dashboard.
3) Set Up Directory Synchronization
Configure SCIM provisioning with your identity provider to synchronize user directories and groups.
4) Create groups in your identity provider
In your identity provider, create (or select) groups that correspond to the RevenueCat roles you want to grant (for example, Admin, Developer, Support, or View Only).
If a user belongs to multiple groups, RevenueCat will grant the highest role.
5) Map SSO groups to RevenueCat roles
In the RevenueCat dashboard:
- Go to Project Settings → Collaborators
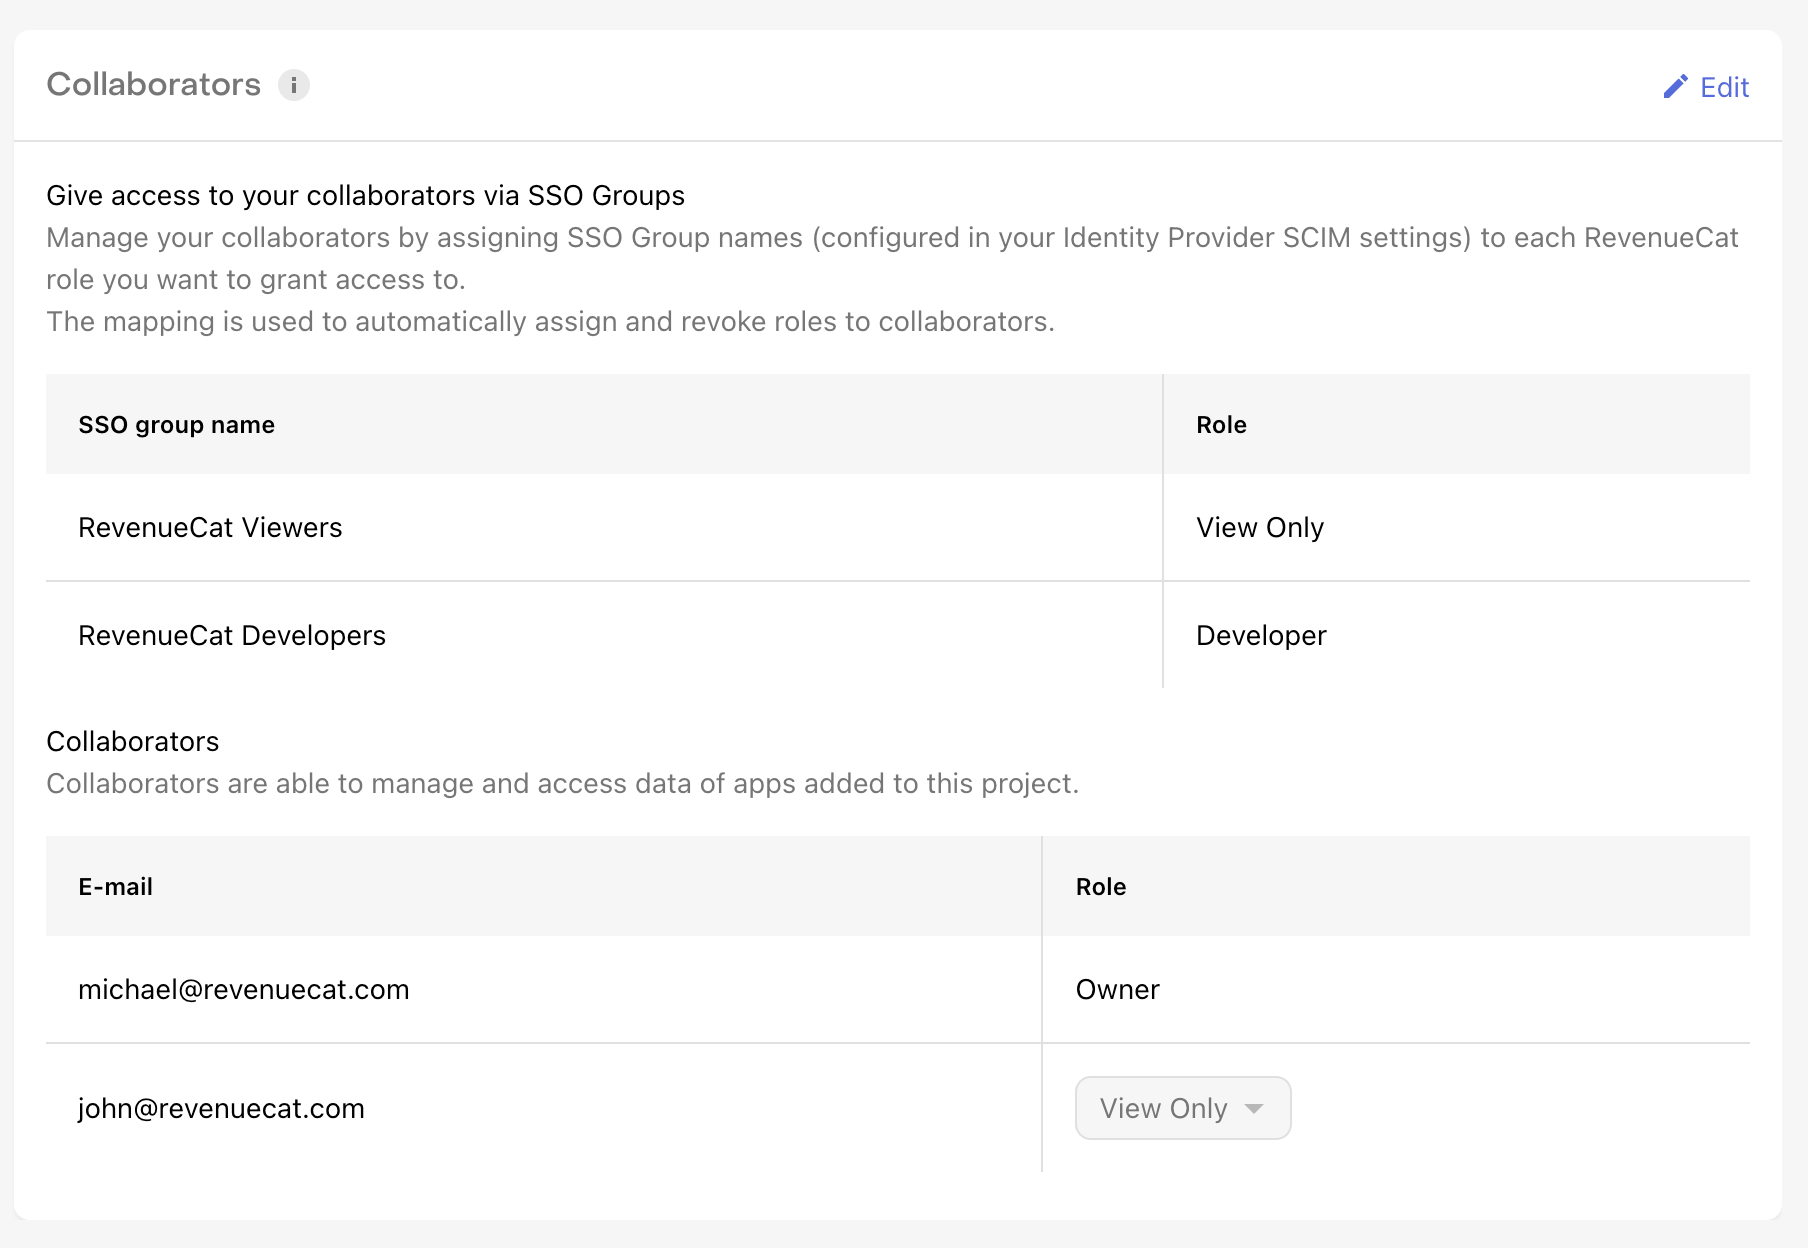
Enabling SSO removes all existing project collaborators and replaces them with SSO group mappings. Make sure the project owner completes setup in RevenueCat and in your identity provider before activating SSO.
- Add an SSO Group
- Select the RevenueCat role that group should receive
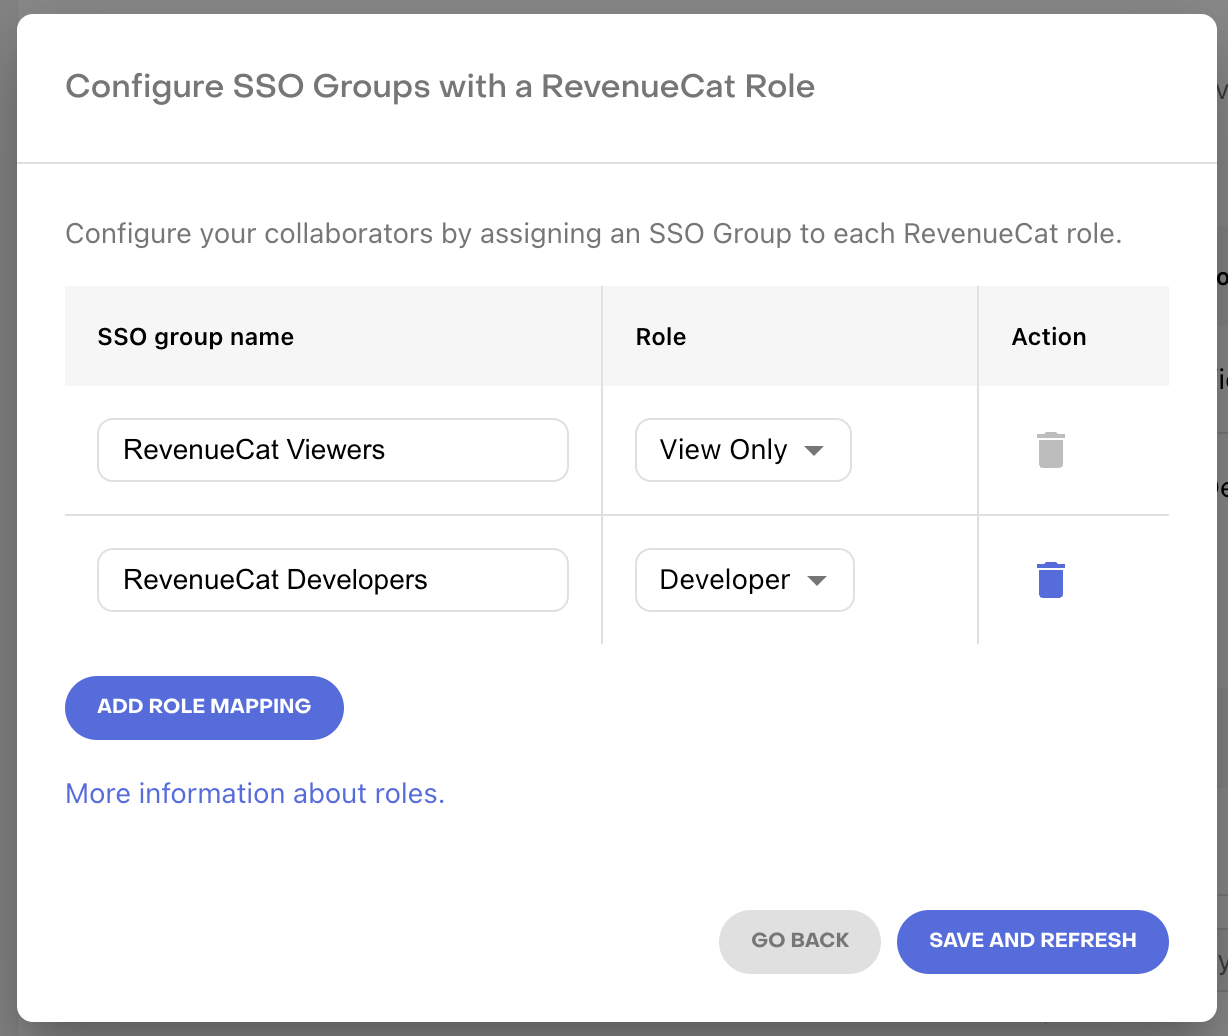
Changes may take a few minutes to sync.
Role precedence (highest wins):
- Admin
- Developer
- Growth
- Support
- View Only
Mapping SSO groups updates project collaborators and may affect currently signed-in users.
6) Activate SSO
Once you've completed the SSO connection setup, directory synchronization, and role mappings, navigate to Account > Security > SSO and click Activate SSO.
When the SSO of your organization is active, users with the domain of your organization will be required to sign in using SSO.
After activation, users with your configured email domain will be required to sign in using SSO.
Managing Your SSO Connection
After initial setup, you can manage your SSO connection settings at any time by clicking Manage SSO Connection from Account > Security > SSO.
This allows you to:
- Update identity provider configuration
- Modify SAML or OIDC settings
- Test your SSO connection
- View connection status
Changes made in the WorkOS Admin Portal are saved automatically and may take a few moments to reflect in the RevenueCat Dashboard.
Managing Your Directory Sync
After initial setup, you can manage your directory synchronization settings at any time by clicking Manage Directory Sync from Account > Security > SSO.
This allows you to:
- Update SCIM provisioning configuration
- Modify directory sync settings
- View synchronization status
- Test directory connection
Changes made in the WorkOS Admin Portal are saved automatically and may take a few moments to reflect in the RevenueCat Dashboard.
Validation checklist
After activating SSO, we recommend verifying the following:
- At least one admin can sign in via SSO
- Users receive the correct project access based on group mappings
- Group and role changes sync successfully (allow a few minutes)
FAQ
What happens if a user is in multiple SSO groups?
The user is granted the highest applicable role based on role precedence.
Do I need to configure SSO group mappings for each project?
Yes. Collaborator access is managed per project, so role mappings must be set up individually for each project.