Web Paywall Links
RevenueCat Billing, the RevenueCat Web SDK, and Web Paywall Links are currently in beta.
Overview
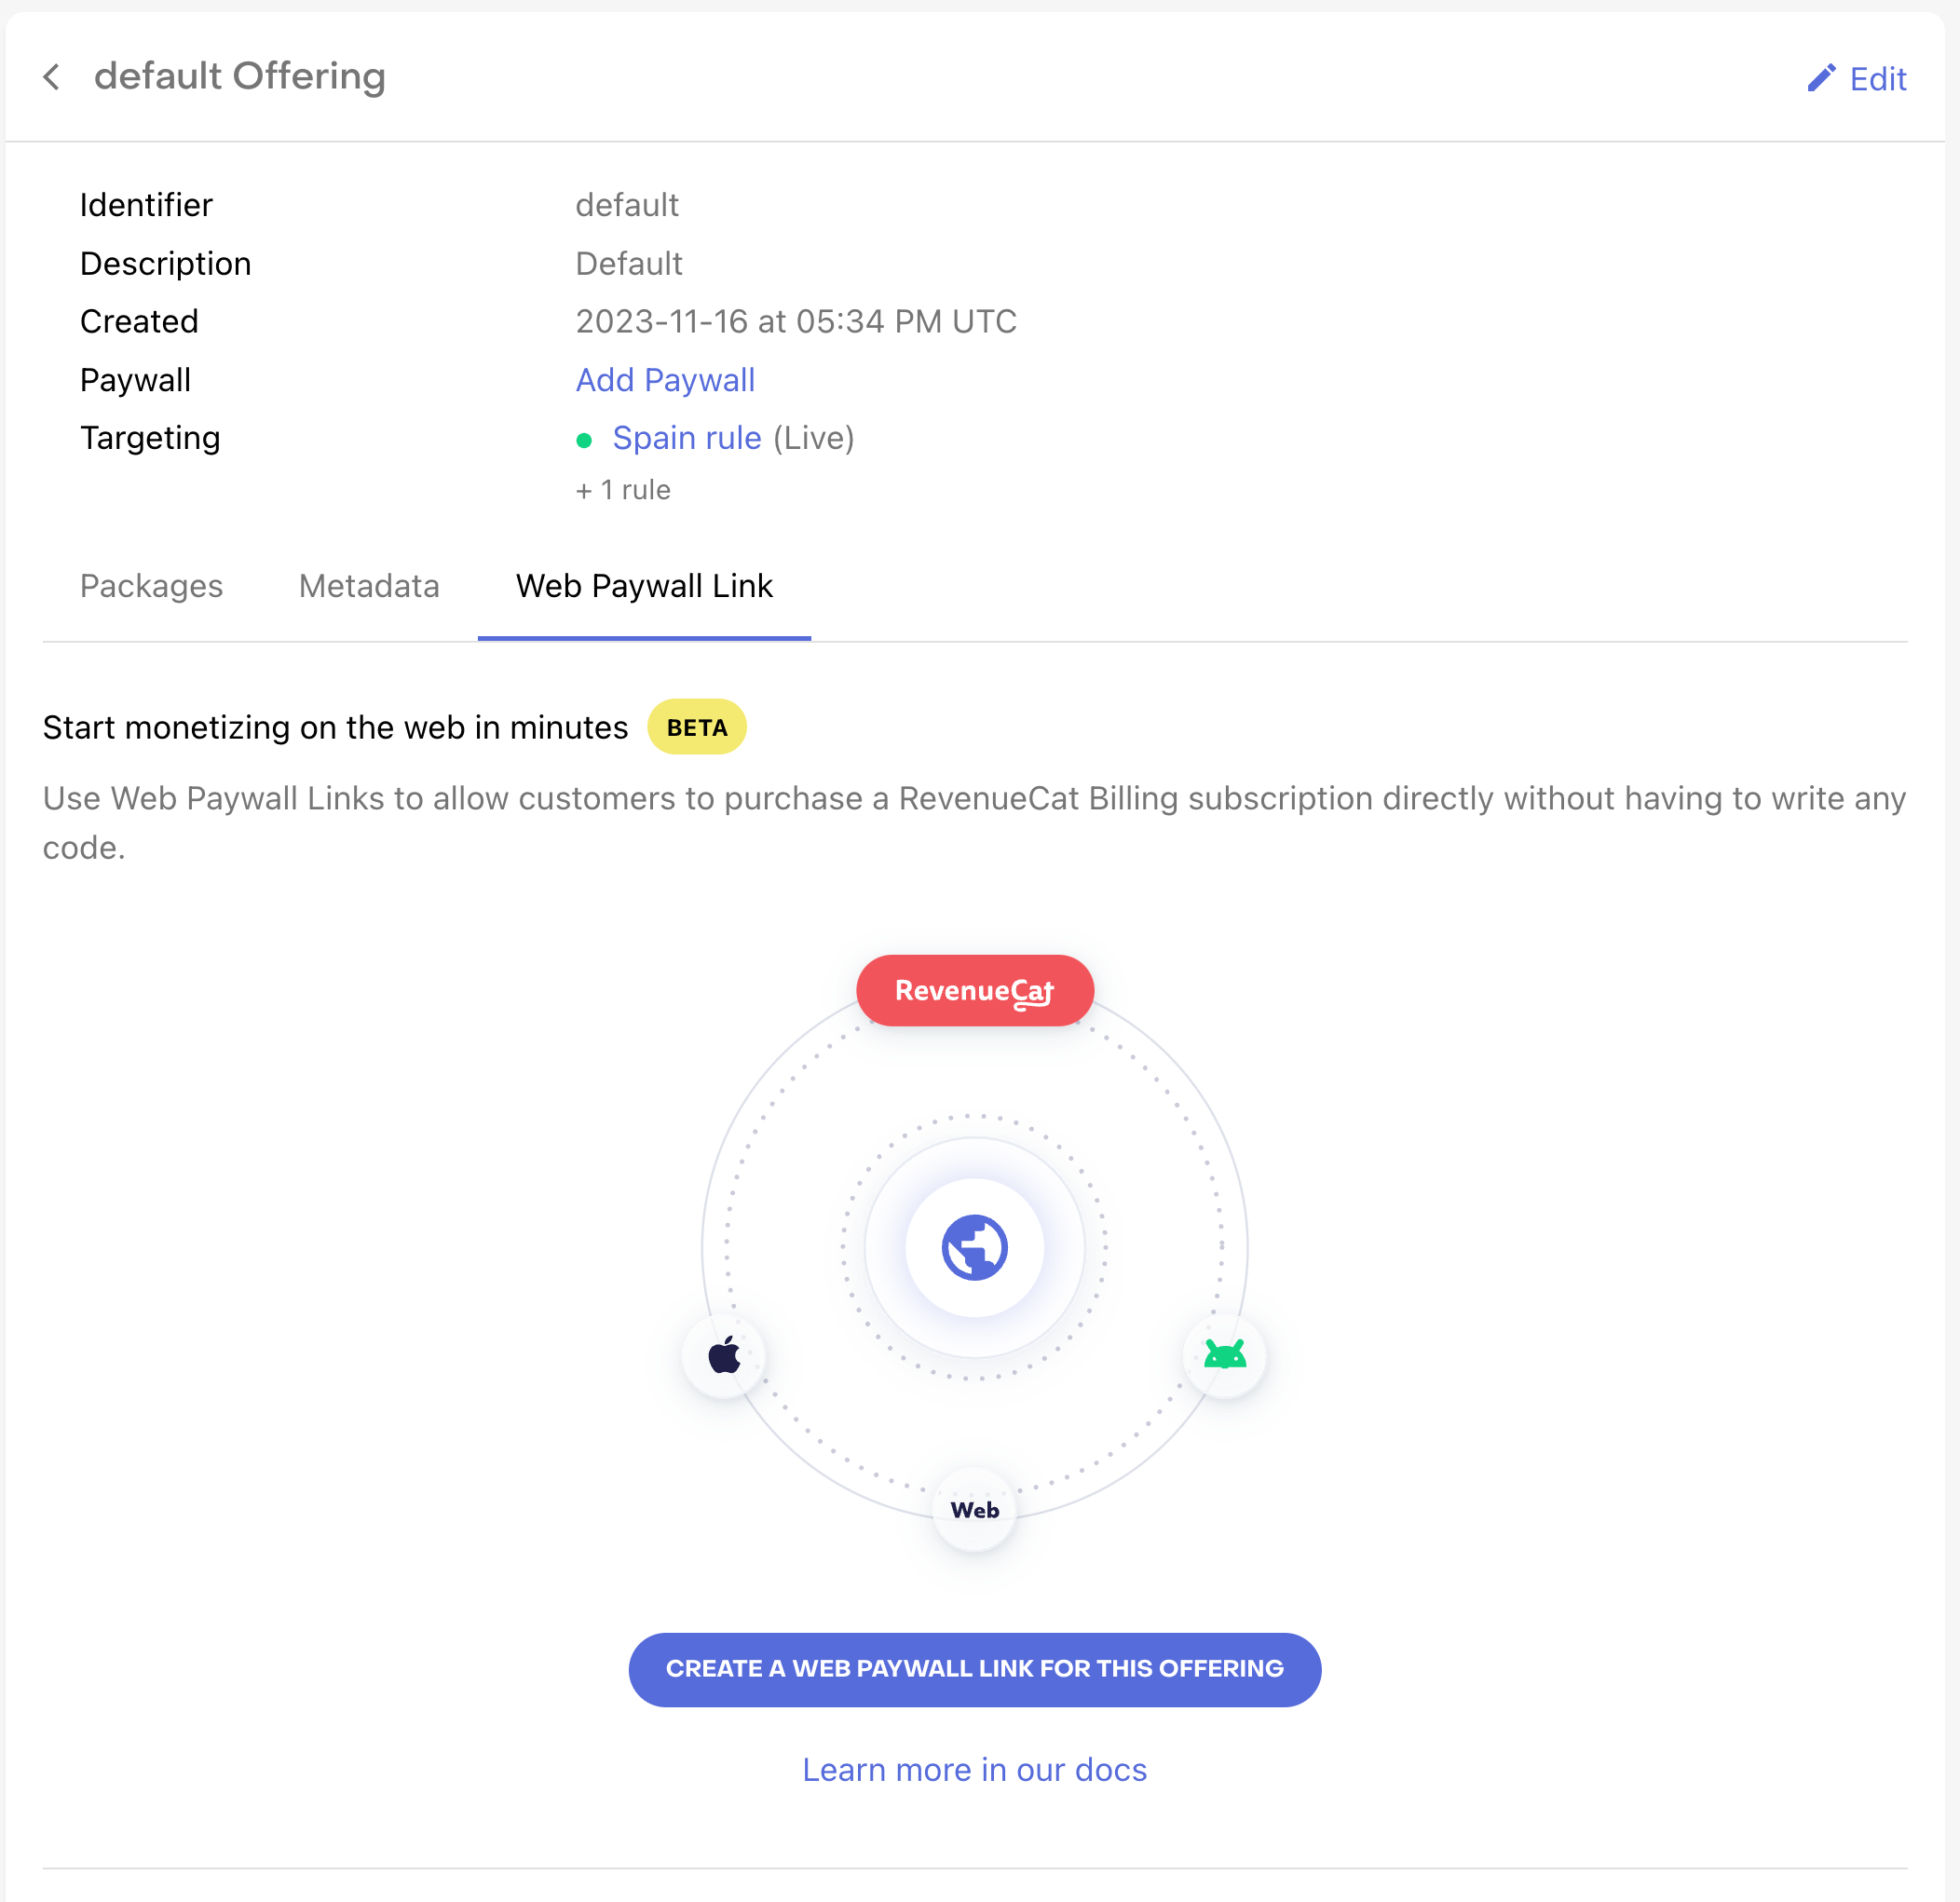
Use Web Paywall Links to allow customers to purchase a RevenueCat Billing subscription directly without having to write any code. Simply append a customer's App User ID to the provided URL and share the link with the customer.
Get Started
- Create a RevenueCat Billing App
- Add the RevenueCat Billing Products you want to serve through your Web Paywall Link
- Create an Offering with those Products
- Visit that Offering's details page and click on the Web Paywall Link tab
- Finally, click on the Create a Web Paywall Link for this Offering button
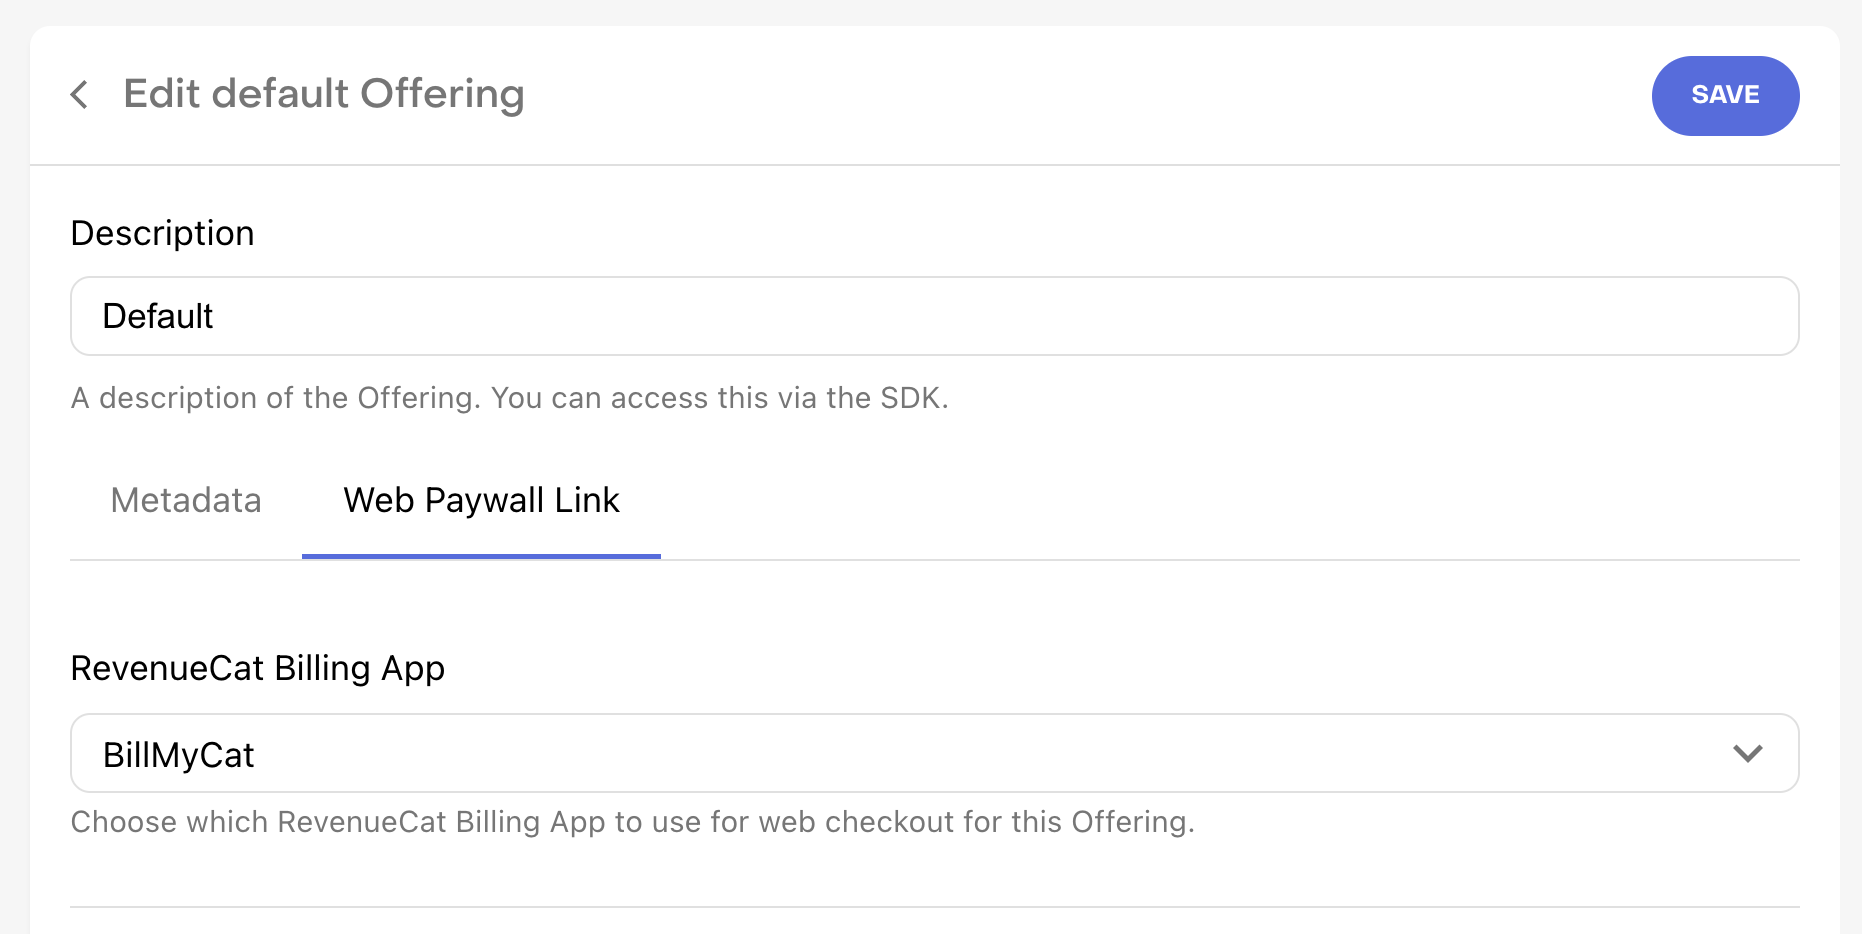
Customise your Web Paywall Link
Choose a RevenueCat Billing app from the dropdown if you have more than one
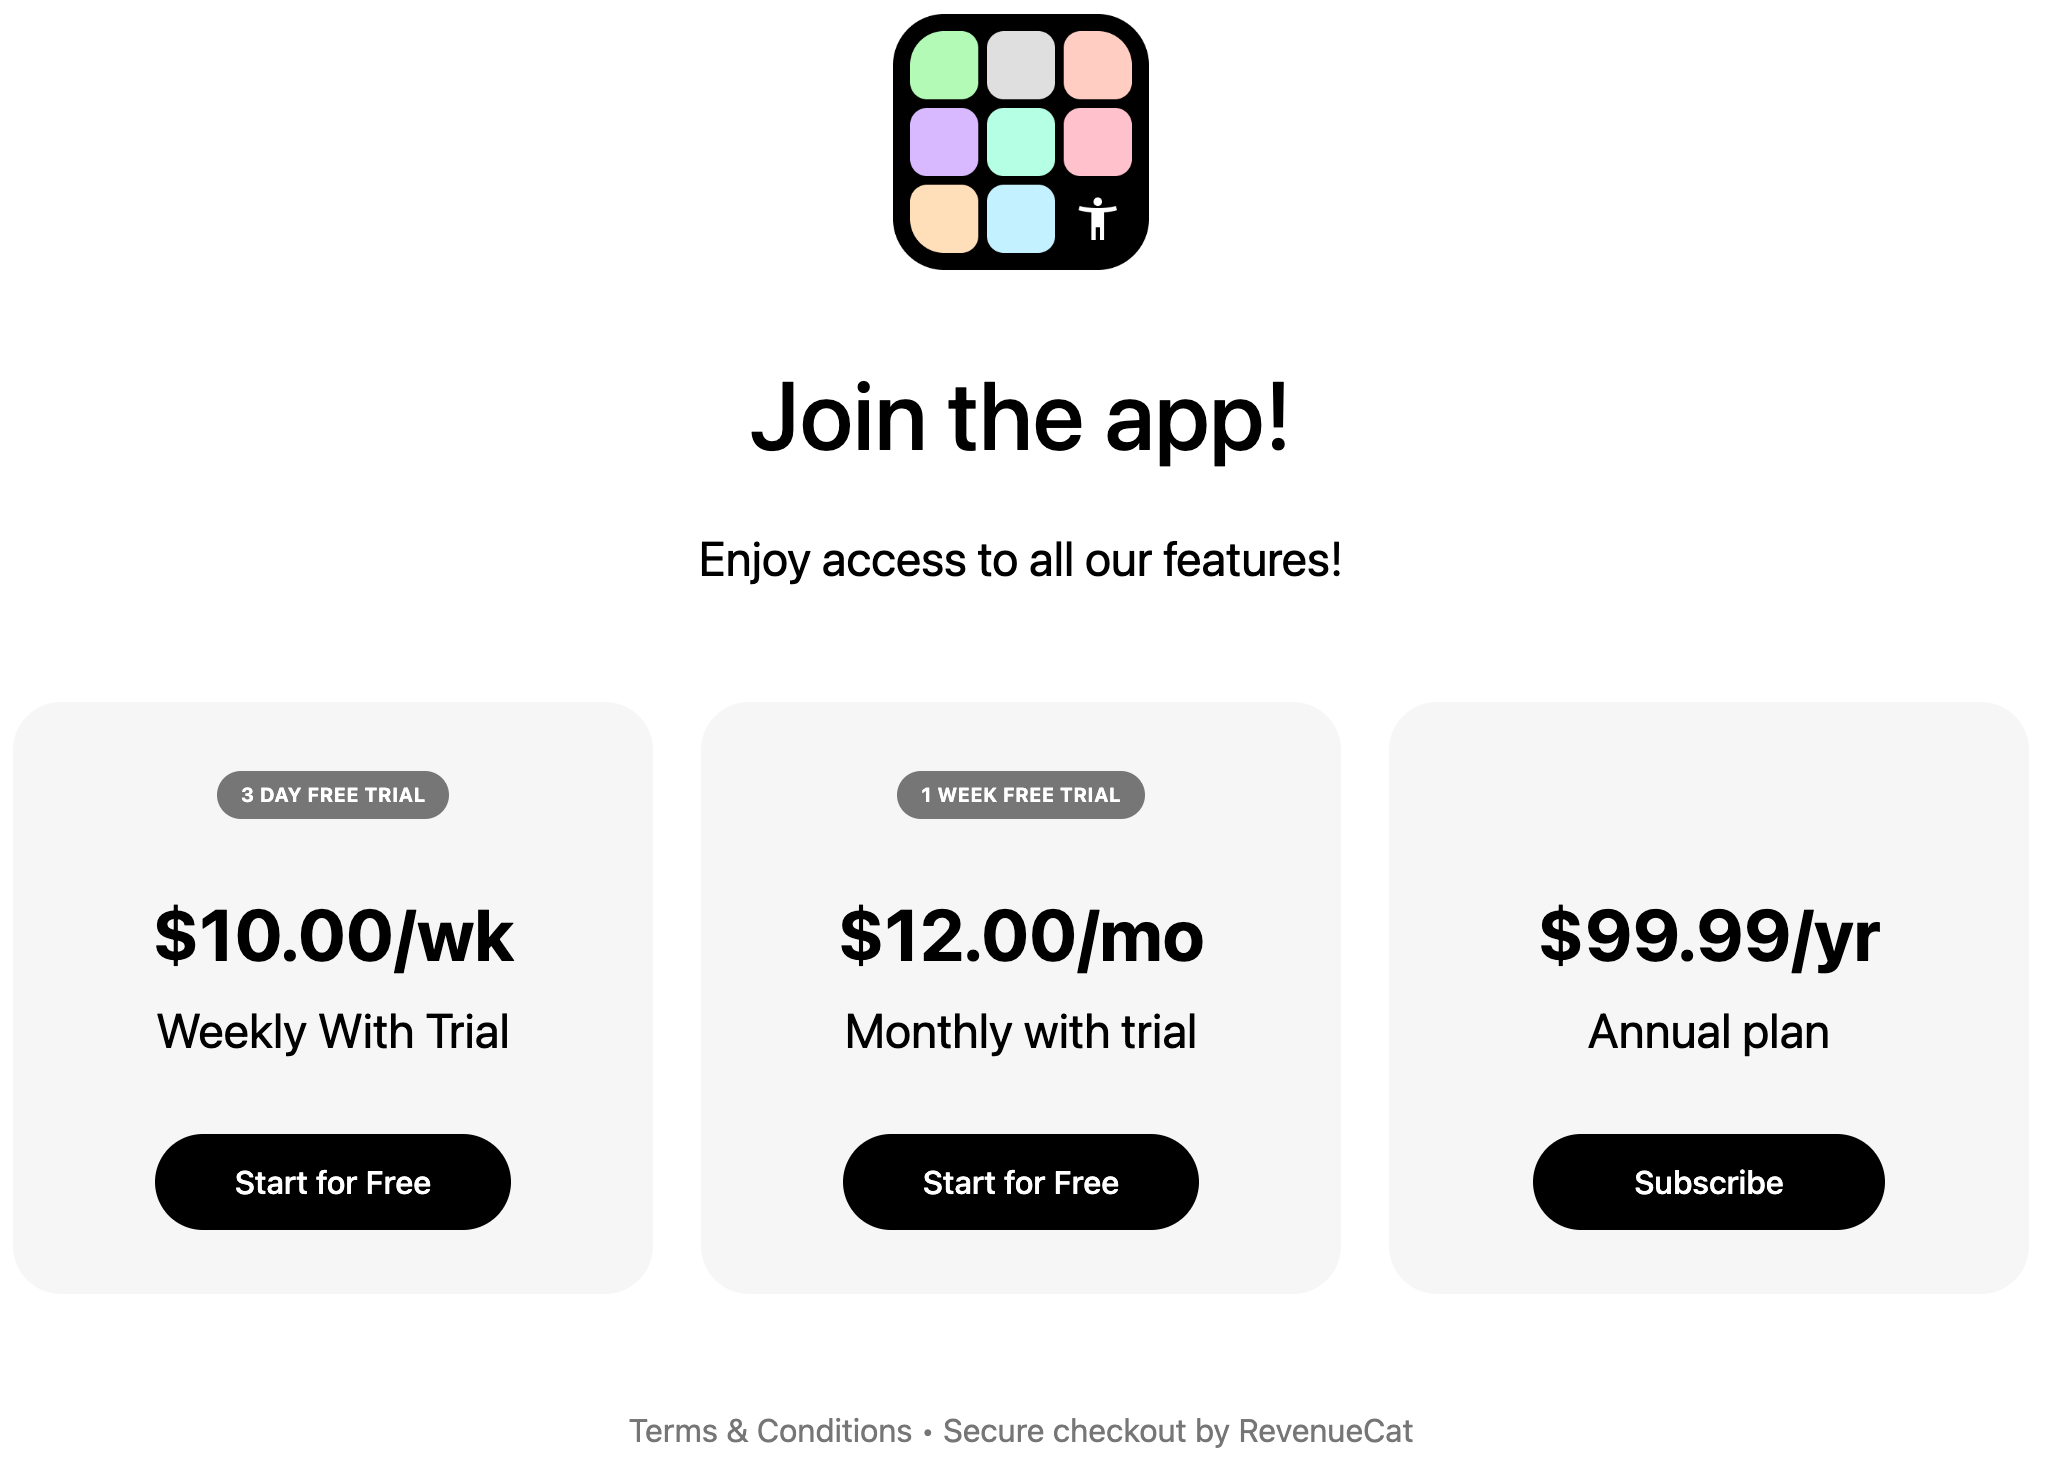
Package Selection page
The first page your customers will see when accessing your Web Paywall Link is the Package selection page. In this page your customers can select one of the products included in your offering.
Here is an example:
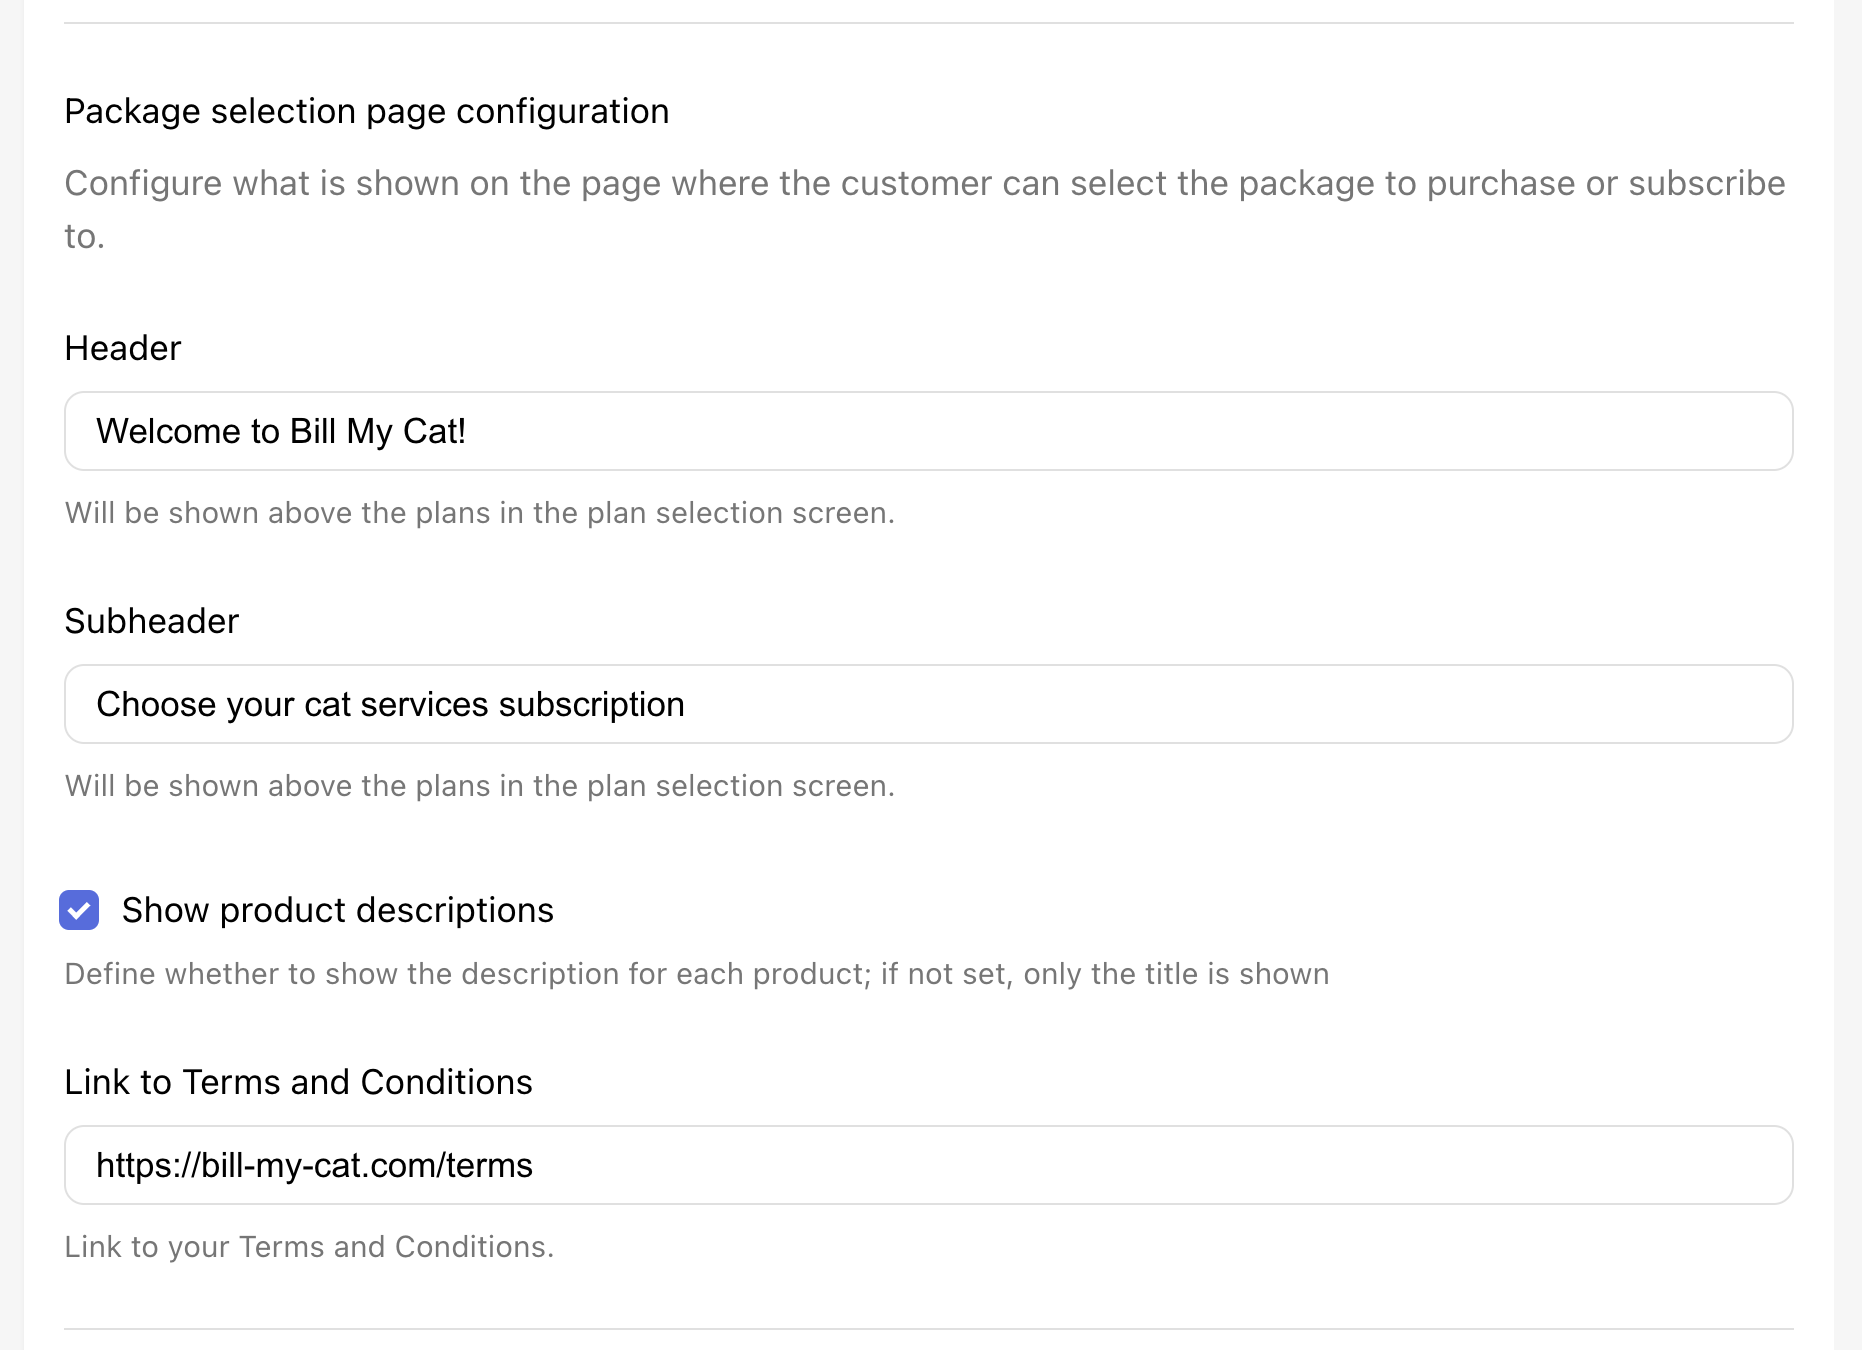
You can customize the:
- The header
- The subheader
- Choose to show or not the product description (check the product setup step for more info)
- The terms and conditions URL
Success page
After subscribing the Web Paywall Link allows you to congratulate the user in 2 ways:
- Show a download page hosted by RevenueCat
- Redirect to any URL you like
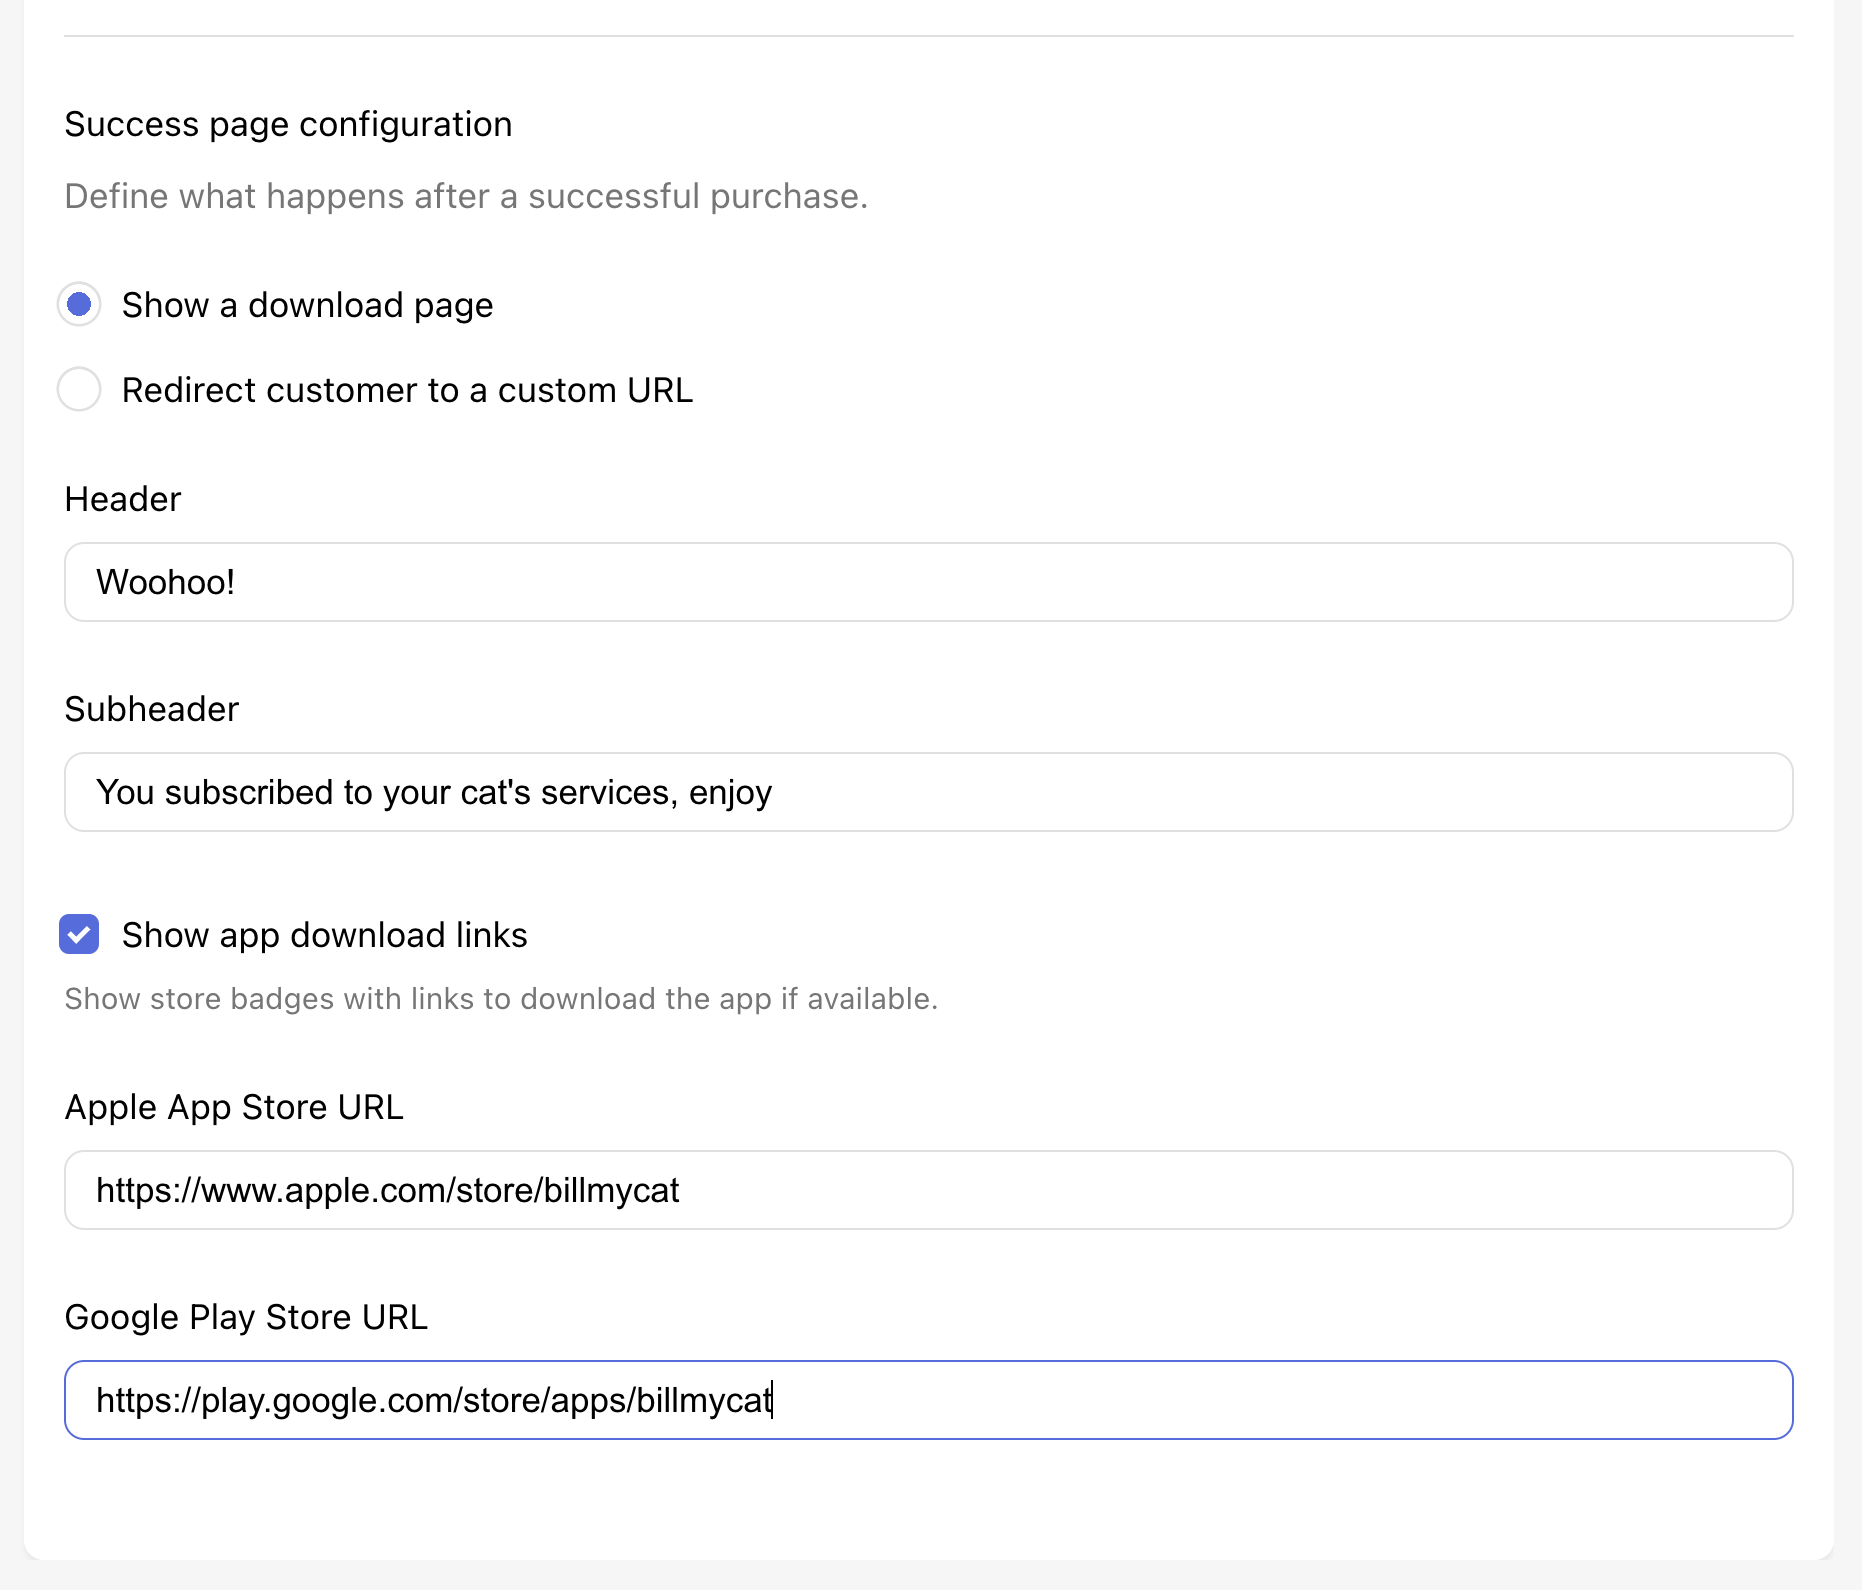
Show a download page
If you choose to show a download page here's how it will look like:
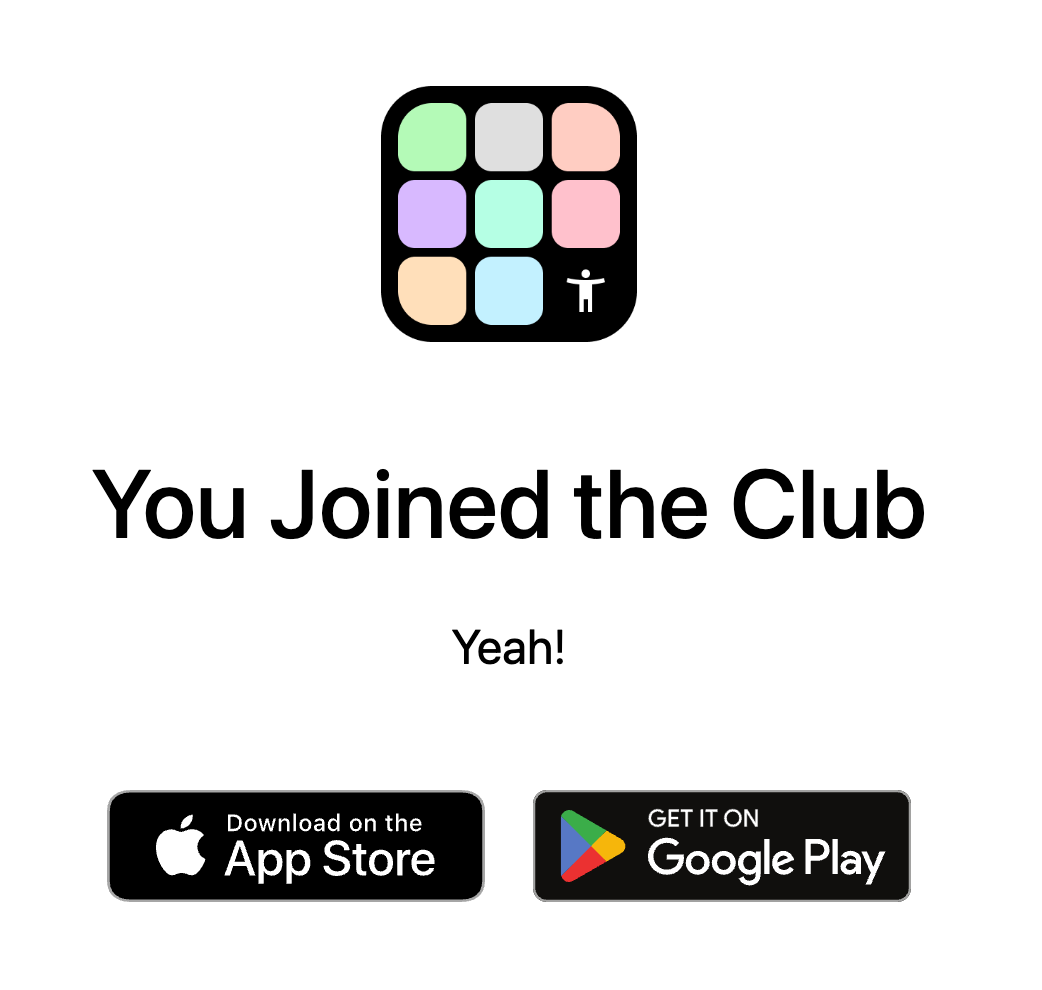
You can customize the download page:
- Header
- Subheader
- Choose whether to show the app download buttons
- Configure the links for
- App Store
- Play Store
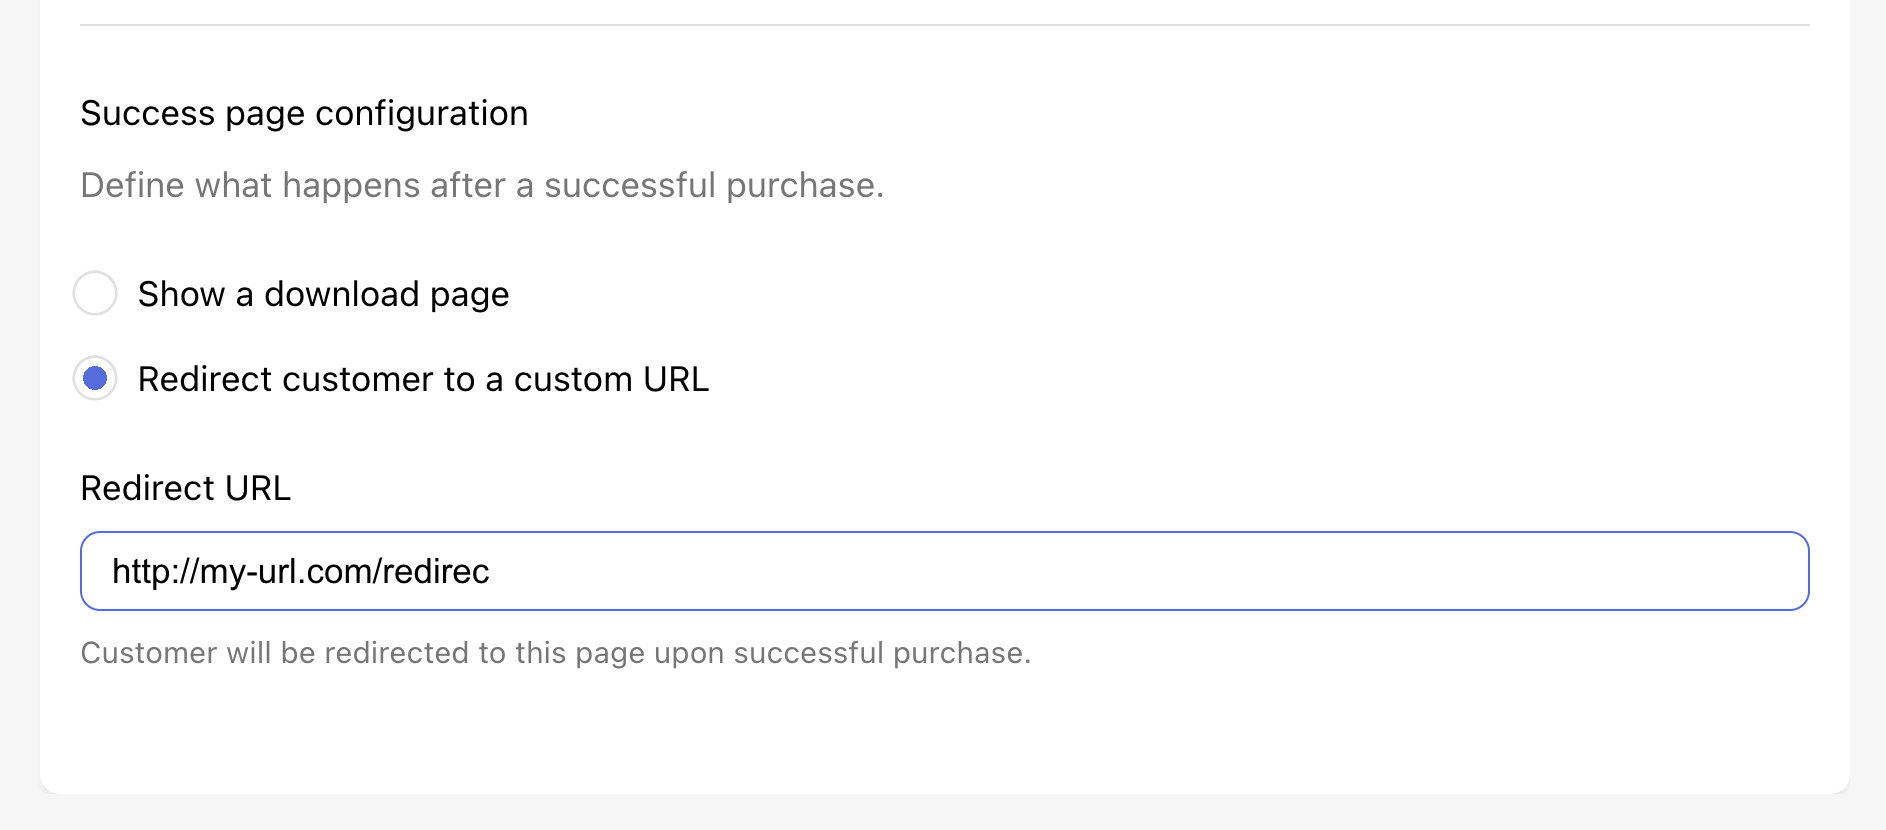
Redirect to a custom URL
In this case, right after purchasing your product, the customer will be redirected to the URL that you specify in the Web Paywall Link configuration.
Once you are ready, click Save and your changes will be applied immediately.
As soon as you click save, any subscriber visiting your Web Paywall Link will see the changes immediately.
You can always run tests by creating a Web Paywall Link for another offering.
Choose what happens for returning customers
You can choose what happens when a customer already has an entitlement or an active subscription and they return to this page.
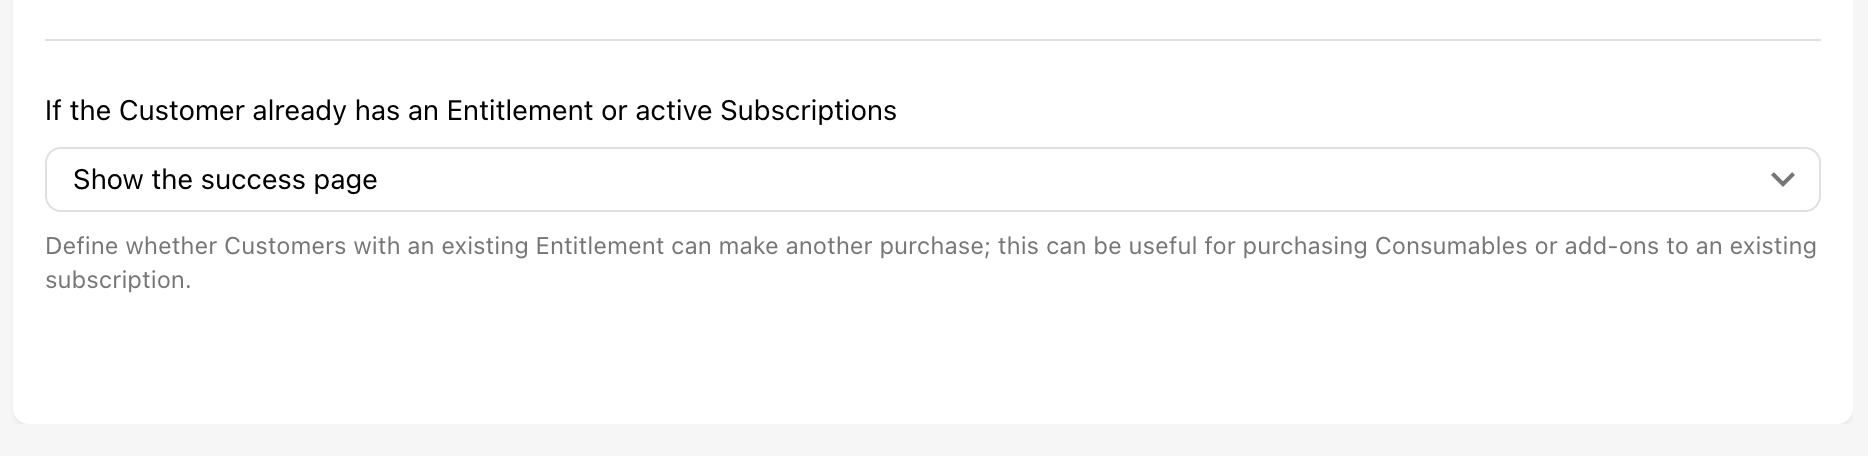
Show the success page
Automatically skips the Package Selection page. It will use the configuration you set up for the success page (show a download page or redirect to a custom URL).
Allow them to make another purchase
Allows the returning customer to purchase another product.
This configuration is useful for non-consumable products. The re-purchase process will fail if the customer tries to purchase the exact same product twice (subscription or non-consumable).
We suggest to create a dedicated offering/web paywall link for non-consumables to make sure all products can be bought as many times as the customer wants.
Sending your Web Paywall Links
Once you finalize your setup you will receive 2 links of the form https://pay.rev.cat/<someProductionTokenWeGenerate>/<yourAppUserId> (one for production, the other one for sandbox).
To use these links, you will need to append the App User ID of the customer (URL encoded) you want to be able to subscribe from the link. Without appending the app user ID, the link will not work.
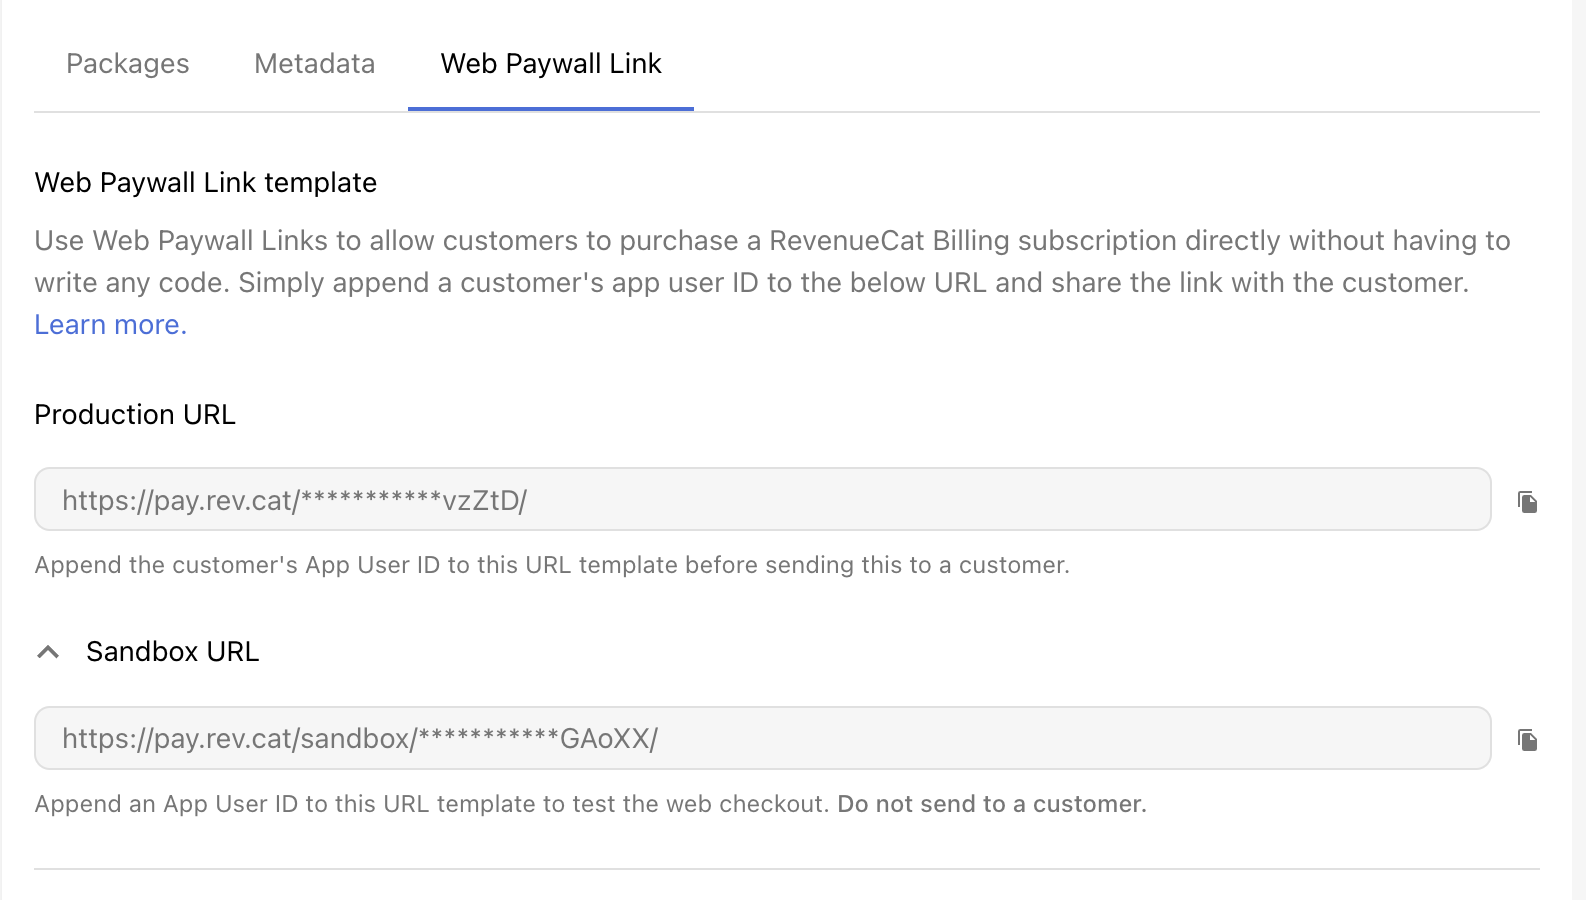
The Sandbox URL allows you to test purchases using Stripe test card numbers. Do not distribute this link or whoever will use it will be able to subscribe to your application for free using one of the Stripe testing cards.
RevenueCat Billing works with identified customers. You need to specify a unique app user id for each one of the subscribers you want to reach with this link. You can read more about this requirement here.
URL parameters
Email
If you already have your customer's email address, use email to preset an email address on the payment page: https://pay.rev.cat/<someProductionTokenWeGenerate>/<yourAppUserId>?email=<customerEmail>
Currency
If you want to specify a currency manually, you can do so by appending the currency query parameter to the URL. This will override the automatic currency selection.