Publish your app on the Galaxy Store
How to create a Samsung Seller Portal account, register your app, and set up in-app purchases in the Galaxy Store



This guide shows you how to publish your Android app on the Samsung Galaxy Store. You'll create a Seller Portal account, register your app, configure in-app purchase items, and submit for review. By the end, you'll have an app in the Galaxy Store that's ready to connect to RevenueCat.
Prerequisites
Before you start, have the following ready:
- A D-U-N-S Number, required to request Commercial Seller Status
- A bank account or PayPal account for your financial information
- An APK build of your app
1. Create a Seller Portal account
To publish apps in the Galaxy Store, you first need a Samsung account and a Seller Portal account.
- Visit the Galaxy Store Seller Portal and click Sign Up Now.
- Click Sign in with Samsung Account.
- On the Samsung Account website, select Create account.
- Accept the Samsung Services Terms & Conditions and the Notice of Financial Incentives. The remaining agreements are optional.
- Enter your Samsung account information. We recommend registering with an organization alias rather than an individual's account.
- Check your email and enter the verification code, then click Done to finish creating your Samsung account.
- Back in the Seller Portal, accept the Terms & Conditions and Privacy Policy to complete your Seller Portal account.
- For Type of Member, select Corporate Seller.
- Fill out the Basic Information and the Primary Contact's information, then click Confirm.
- Samsung sends a confirmation email to the address you registered with. Open it and confirm the registration by signing in to your Samsung account.
2. Request Commercial Seller Status
Commercial Seller Status is required to publish Android apps in the Galaxy Store, even if your apps are free.
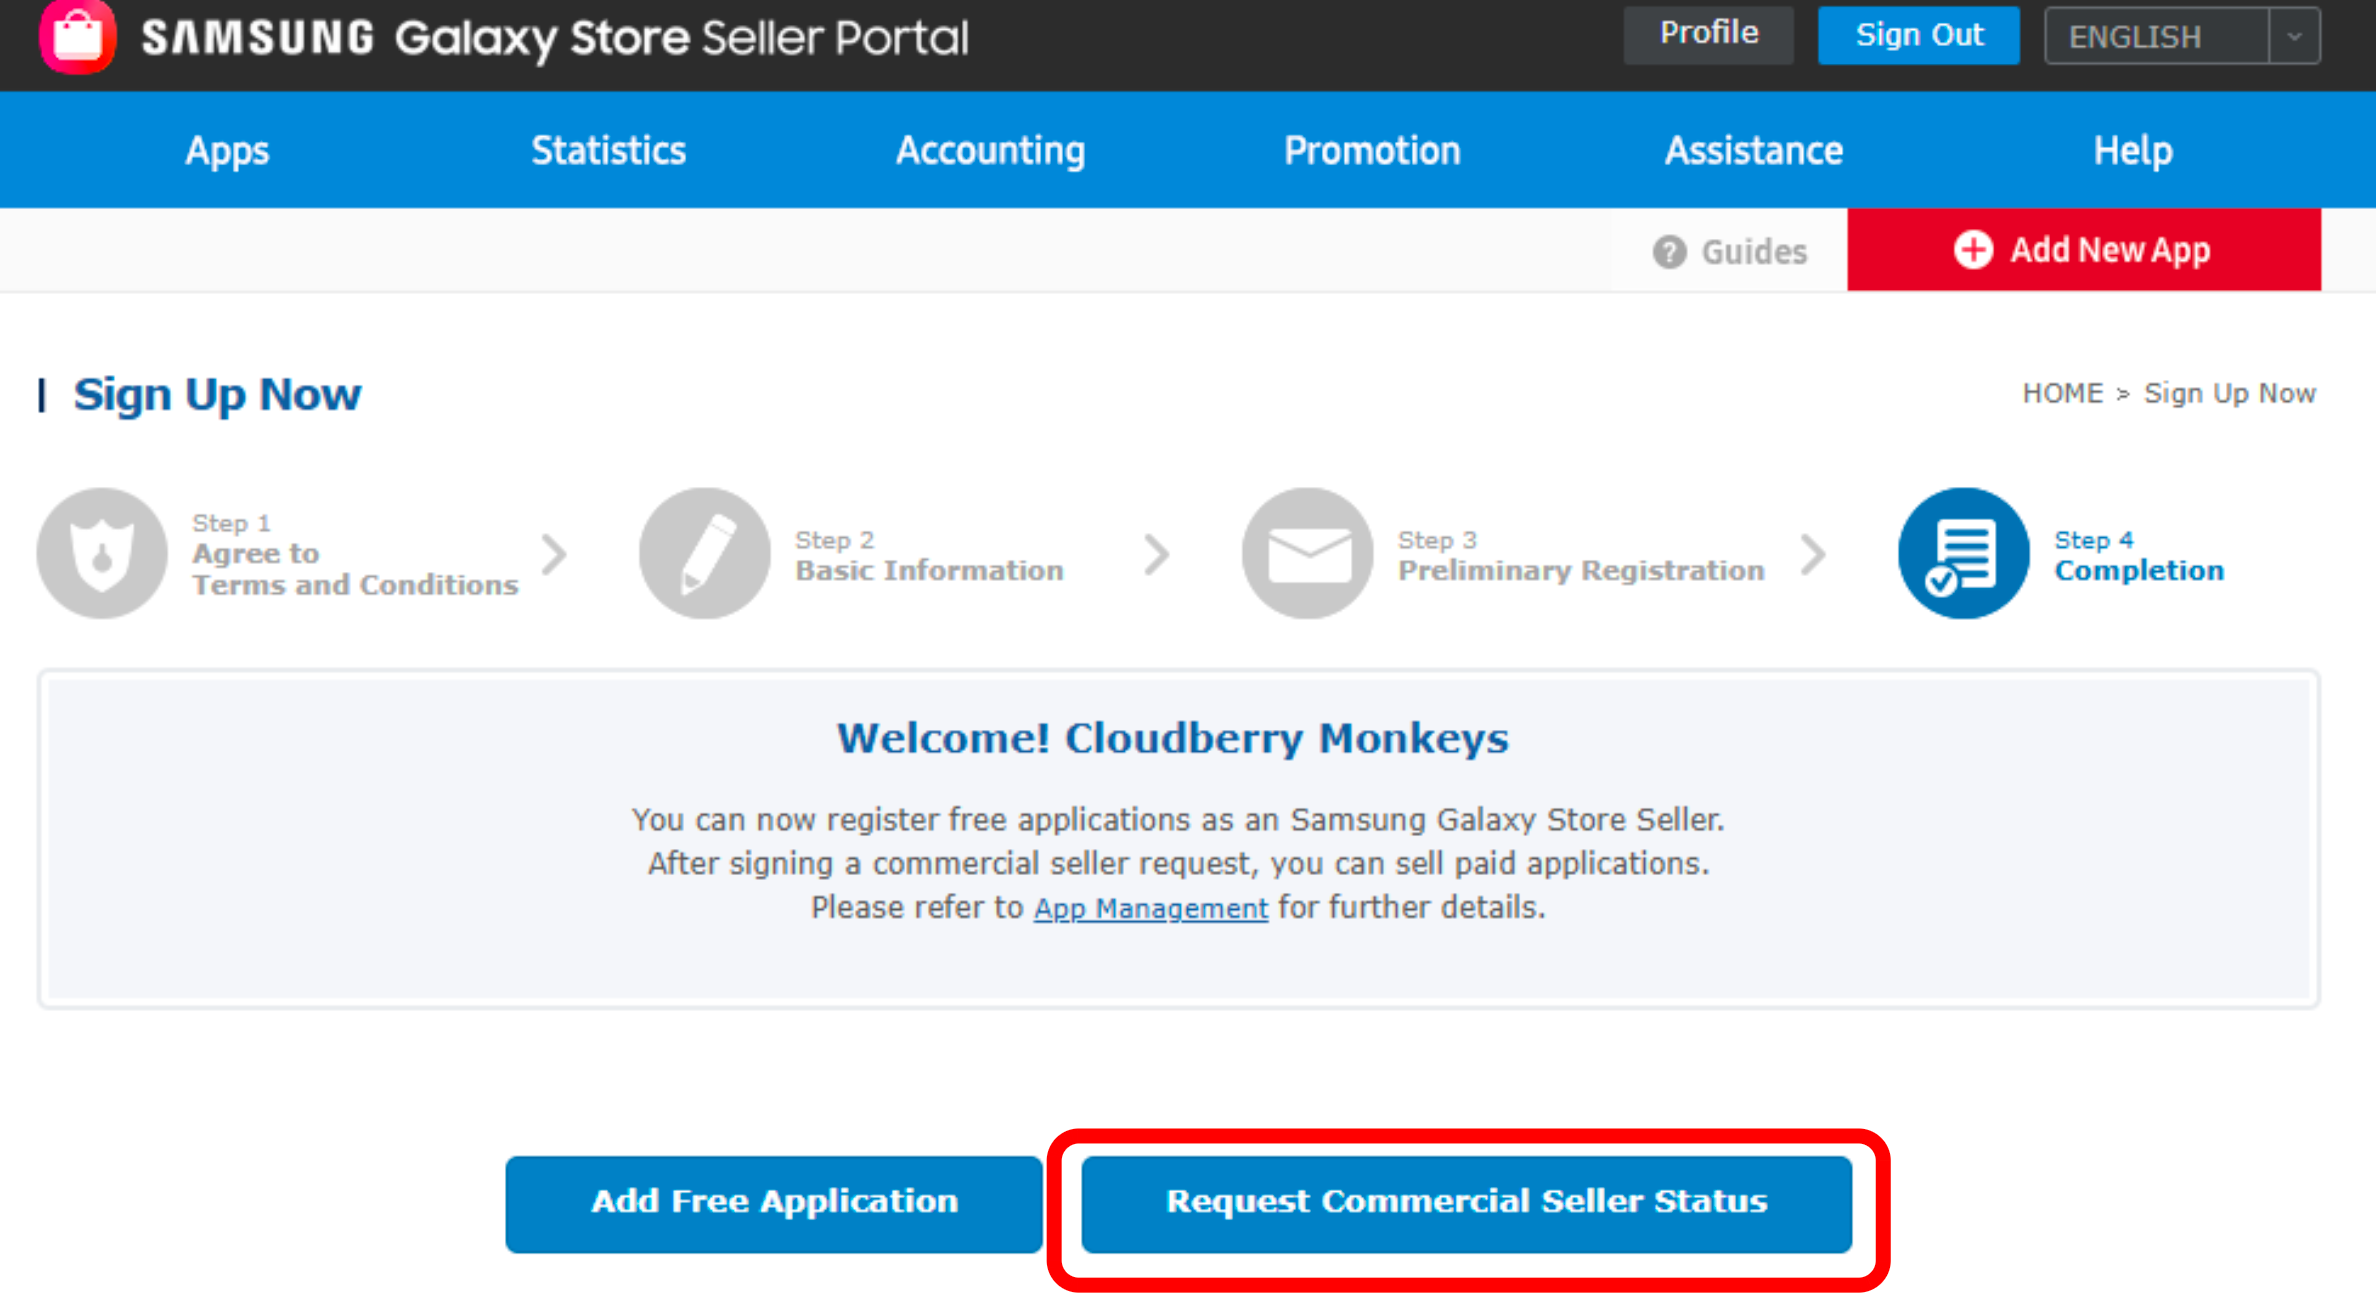
- In the Seller Portal, click Request Commercial Seller Status.
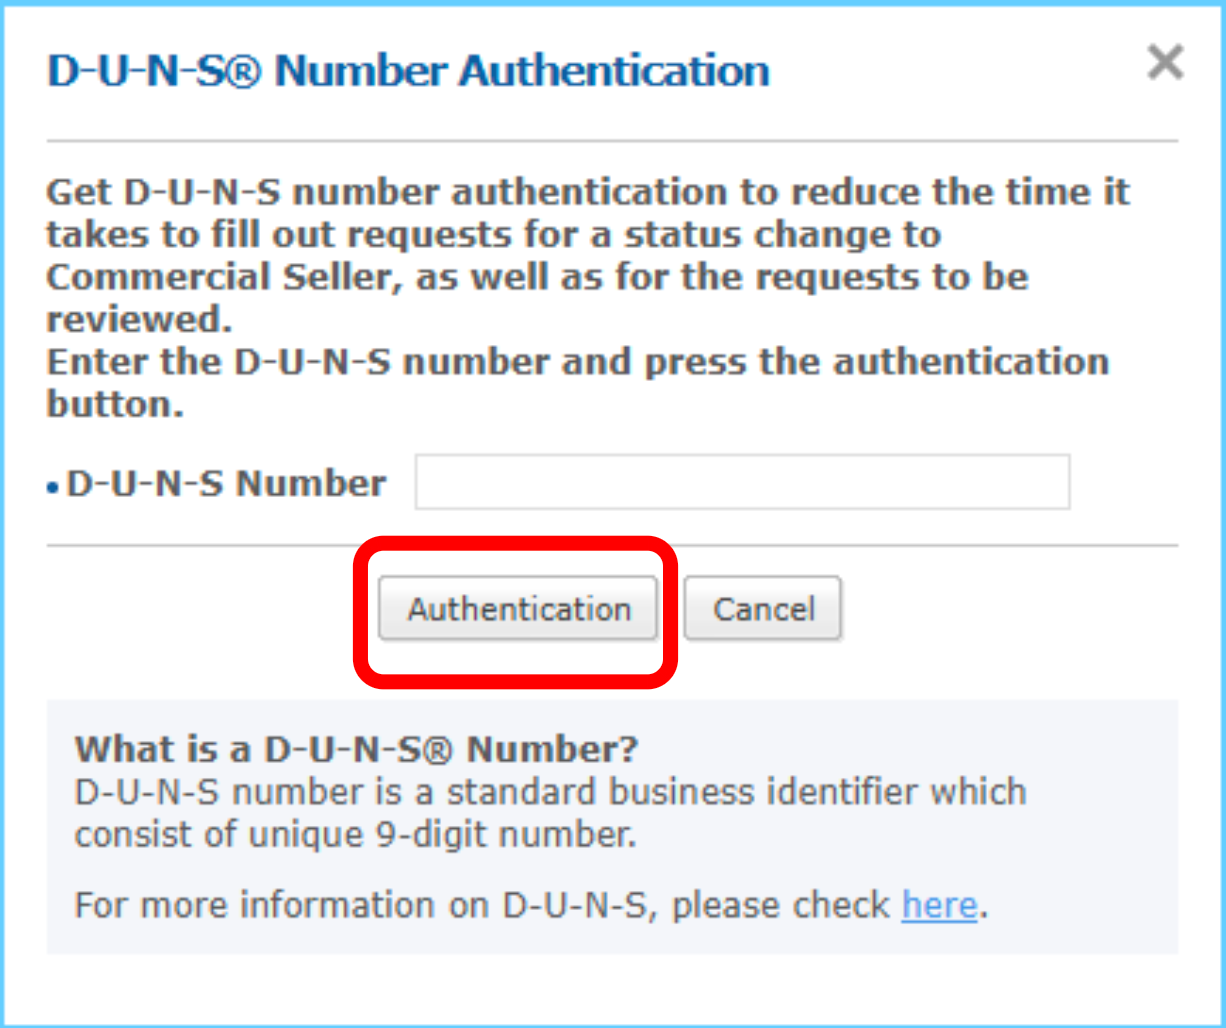
- On the D-U-N-S® Number Authentication screen, enter your D-U-N-S Number and click Authentication.
- Fill out the Basic Information and Primary Contact's Information.
- In the Financial Information section, add a bank account or a PayPal account.
- Click Request.
Email your seller email address to the Galaxy Store Onboarding team at rc.onboard@samsung.com so the approval process can be expedited.
3. Register your app
Once the Galaxy Store Onboarding team confirms your account is approved, you can register your app.
- In the Seller Portal, select Add New App.
- Select Android.
- Select a default language.
- In the App Information tab, enter the App Title. You can optionally use Import Google App to pull the metadata from your Google Play app listing.
- Provide the app metadata. The table below lists each field and whether it's required.
- Click Save.
| Metadata | Required |
|---|---|
| App title | Yes |
| Description | Yes |
| Short description | Yes |
| Icon (512x512) for Android | Yes |
| Screenshots (2:1 image ratio, minimum 4, maximum 8 images) | Yes |
| Category (only "General" is required) | Yes |
| Age restriction | Yes |
| Supported languages | Yes |
| Support email | Yes |
| Search keywords | No |
| Edge icons | No |
| Rating certificate for available countries/regions | No |
| Open source URL | No |
| YouTube URL | No |
| Copyright holder and copyright proof file | No |
| Support URL | No |
| Notify result | No |
4. Upload your binary
- In the Binary tab, select Upload APK binary > Add Binary. Google Play features like asset delivery and feature delivery won't work in the Galaxy Store.
- Select whether the app uses Google Mobile Services, then click Save.
5. Set your price and countries
- In the Country/Region & Price tab, select Free or Paid, and set the price for paid apps.
- Select the countries and regions where the app will be published.
- Click Save.
6. Choose publication settings
In the Publication tab:
- Select how the app is published: Publish Automatically, Publish on Date, or Publish Manually.
- Optionally, apply a staged rollout.
- Agree to US export laws.
- Click Save.
A business registration number is required to publish in the EU.
7. Create in-app purchase items
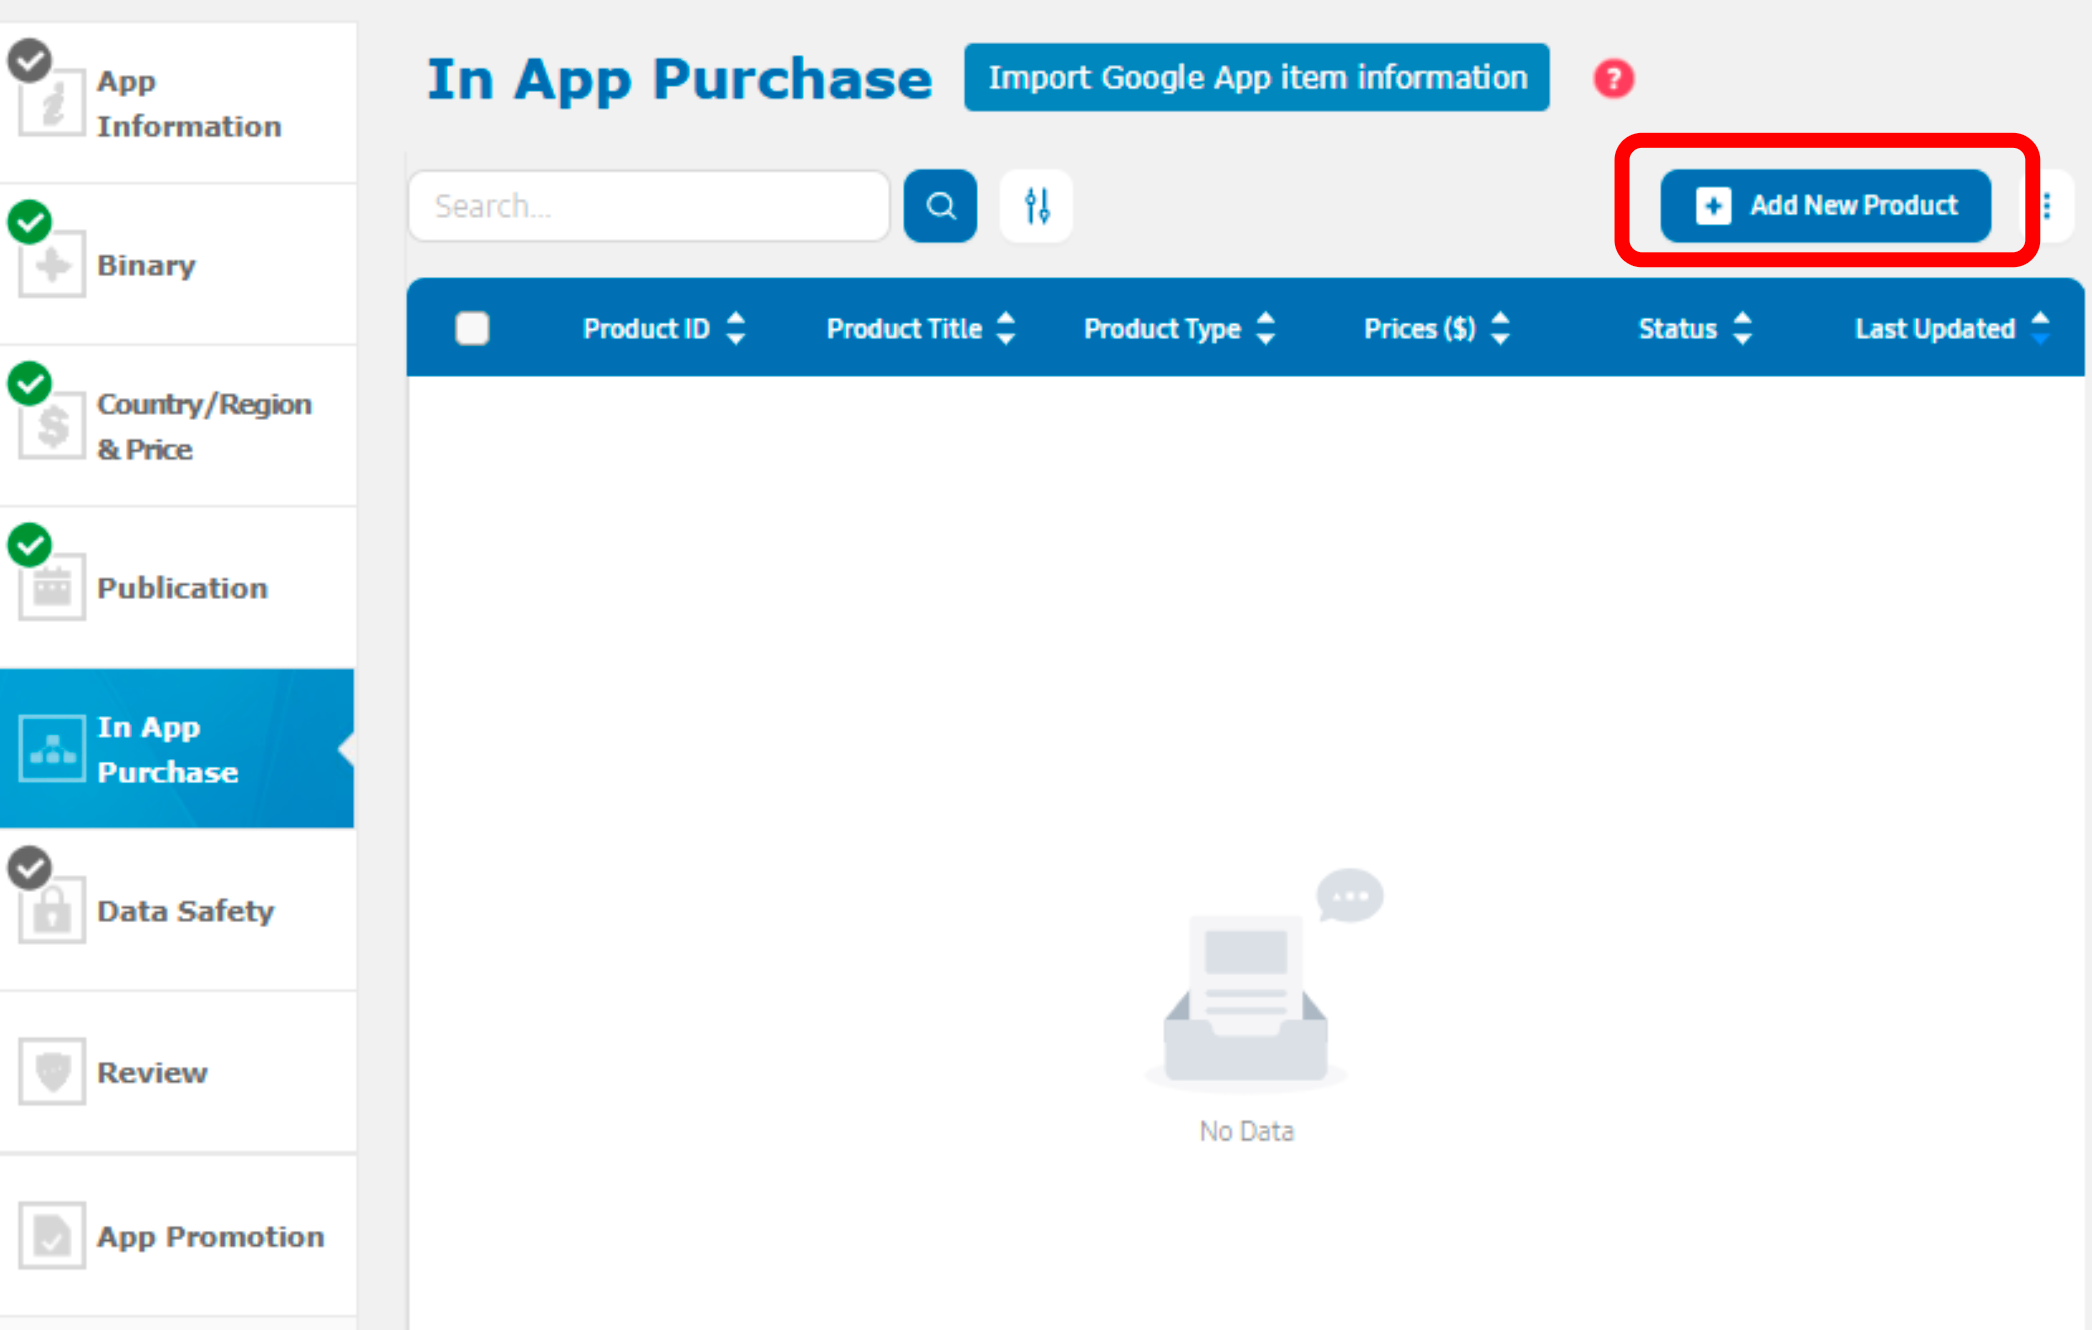
In the In App Purchase tab, you can register items (consumables and non-consumables) and subscriptions. Click Add New Product to register a product manually.
The 3-dot menu gives you access to Bulk Upload, item export to CSV, price templates, and ISN URL configuration. Note that Import Google App item information and Bulk Upload don't support subscriptions.
Register a subscription
Clicking Add New Product and selecting Subscription opens the Add New Subscription dialog, which walks you through four tabs: Description, Price, Subscription, and Summary. Clicking Next moves you to the next tab.
- In the Description tab, enter a Product ID (unique identifier), a Product Title, and a Description. Click Next.
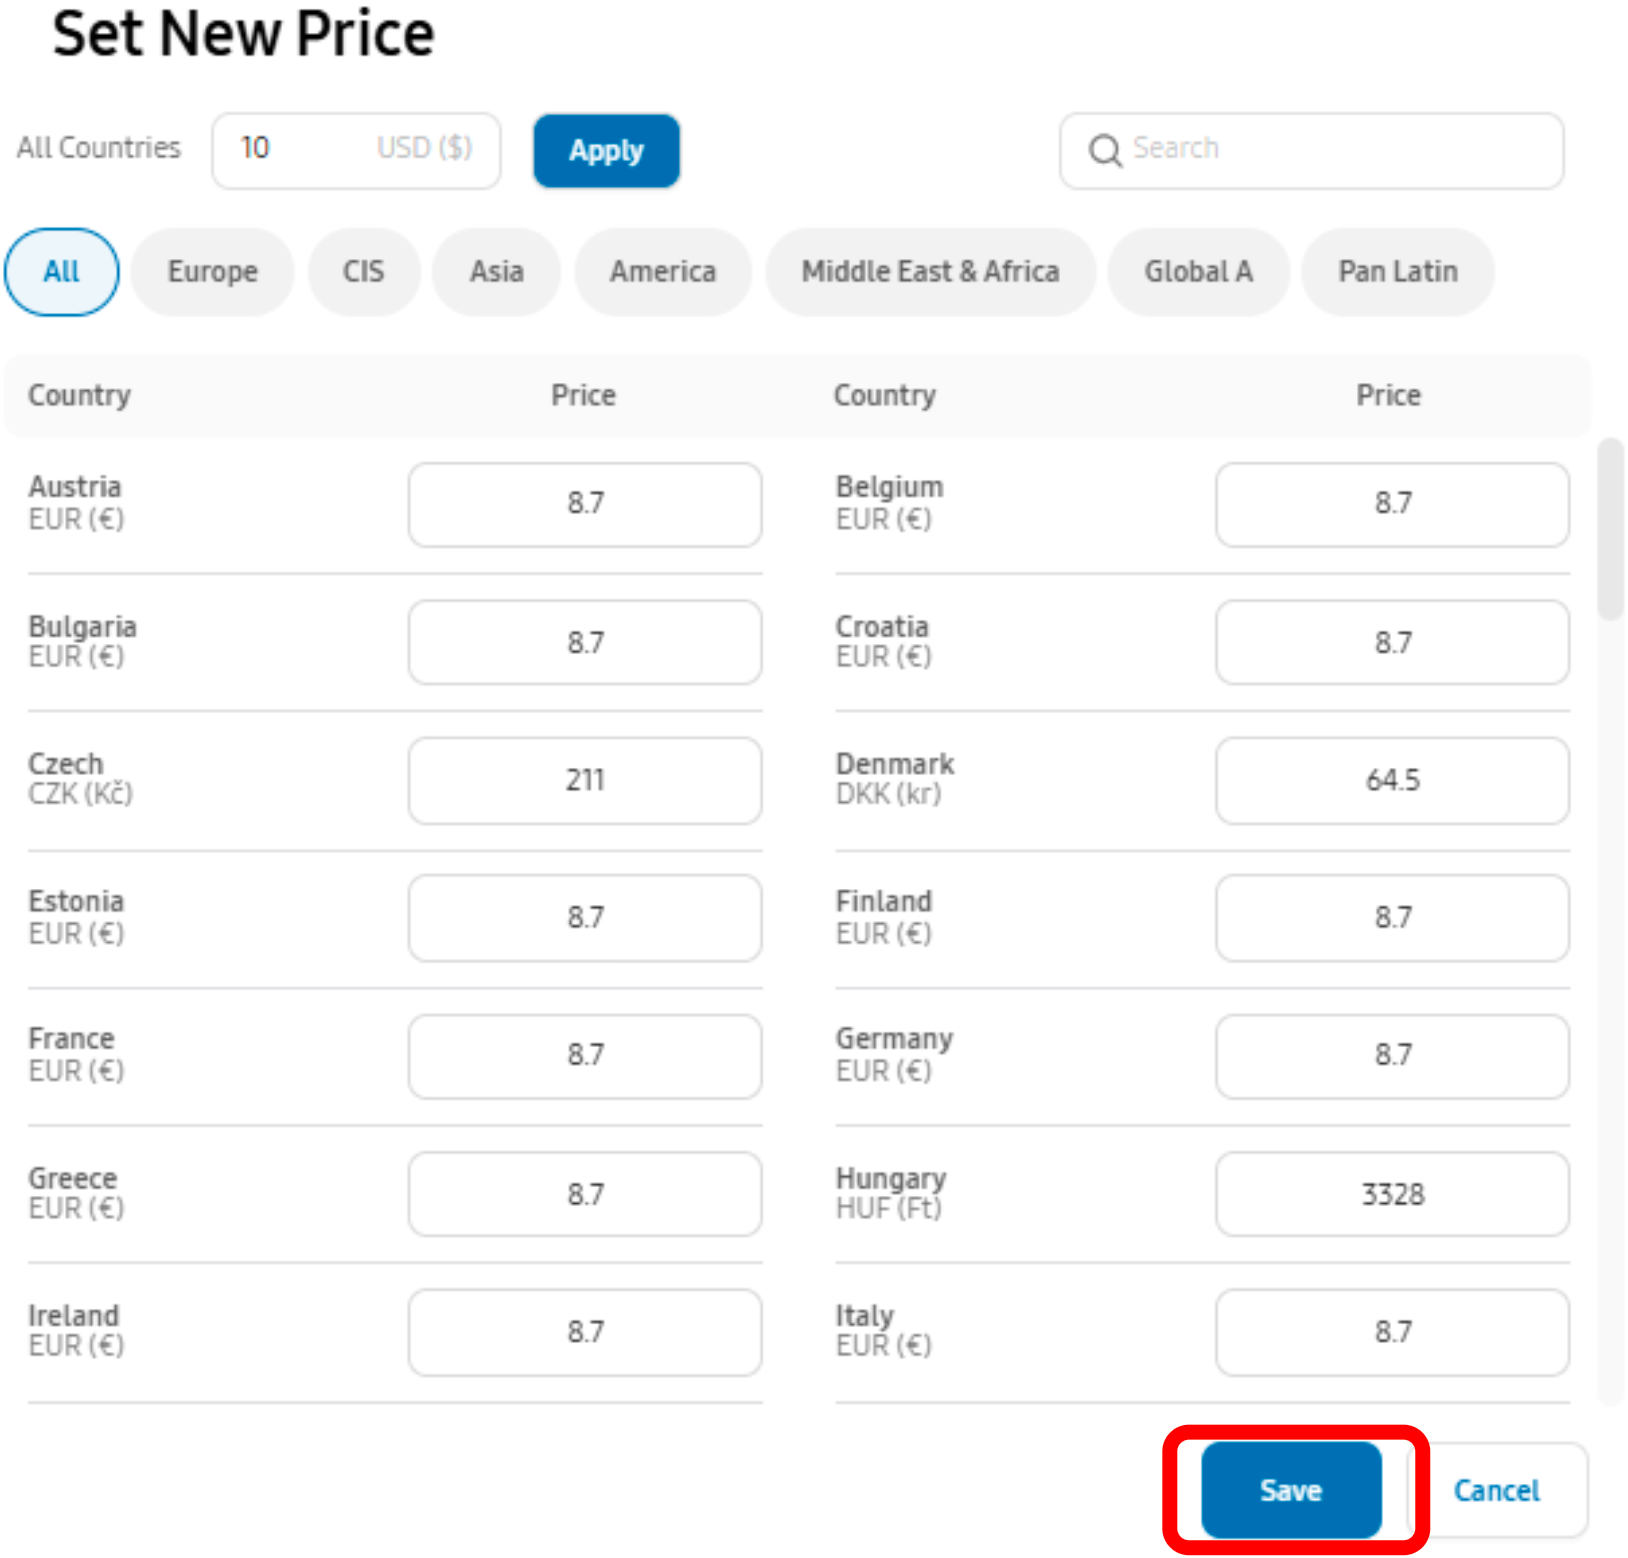
- In the Price tab, determine the standard price of the subscription and apply it to the different countries. If you select Introductory Price, determine the discounted price and the discount period. Phone Bill (carrier billing) is supported in selected countries. Click Next.
- In the Subscription tab, define the subscription payment cycle, grace period, and free trial period (if any). Select the Free Trial/Tiered Pricing Limit configuration and, if needed, a specific availability period. Click Next.
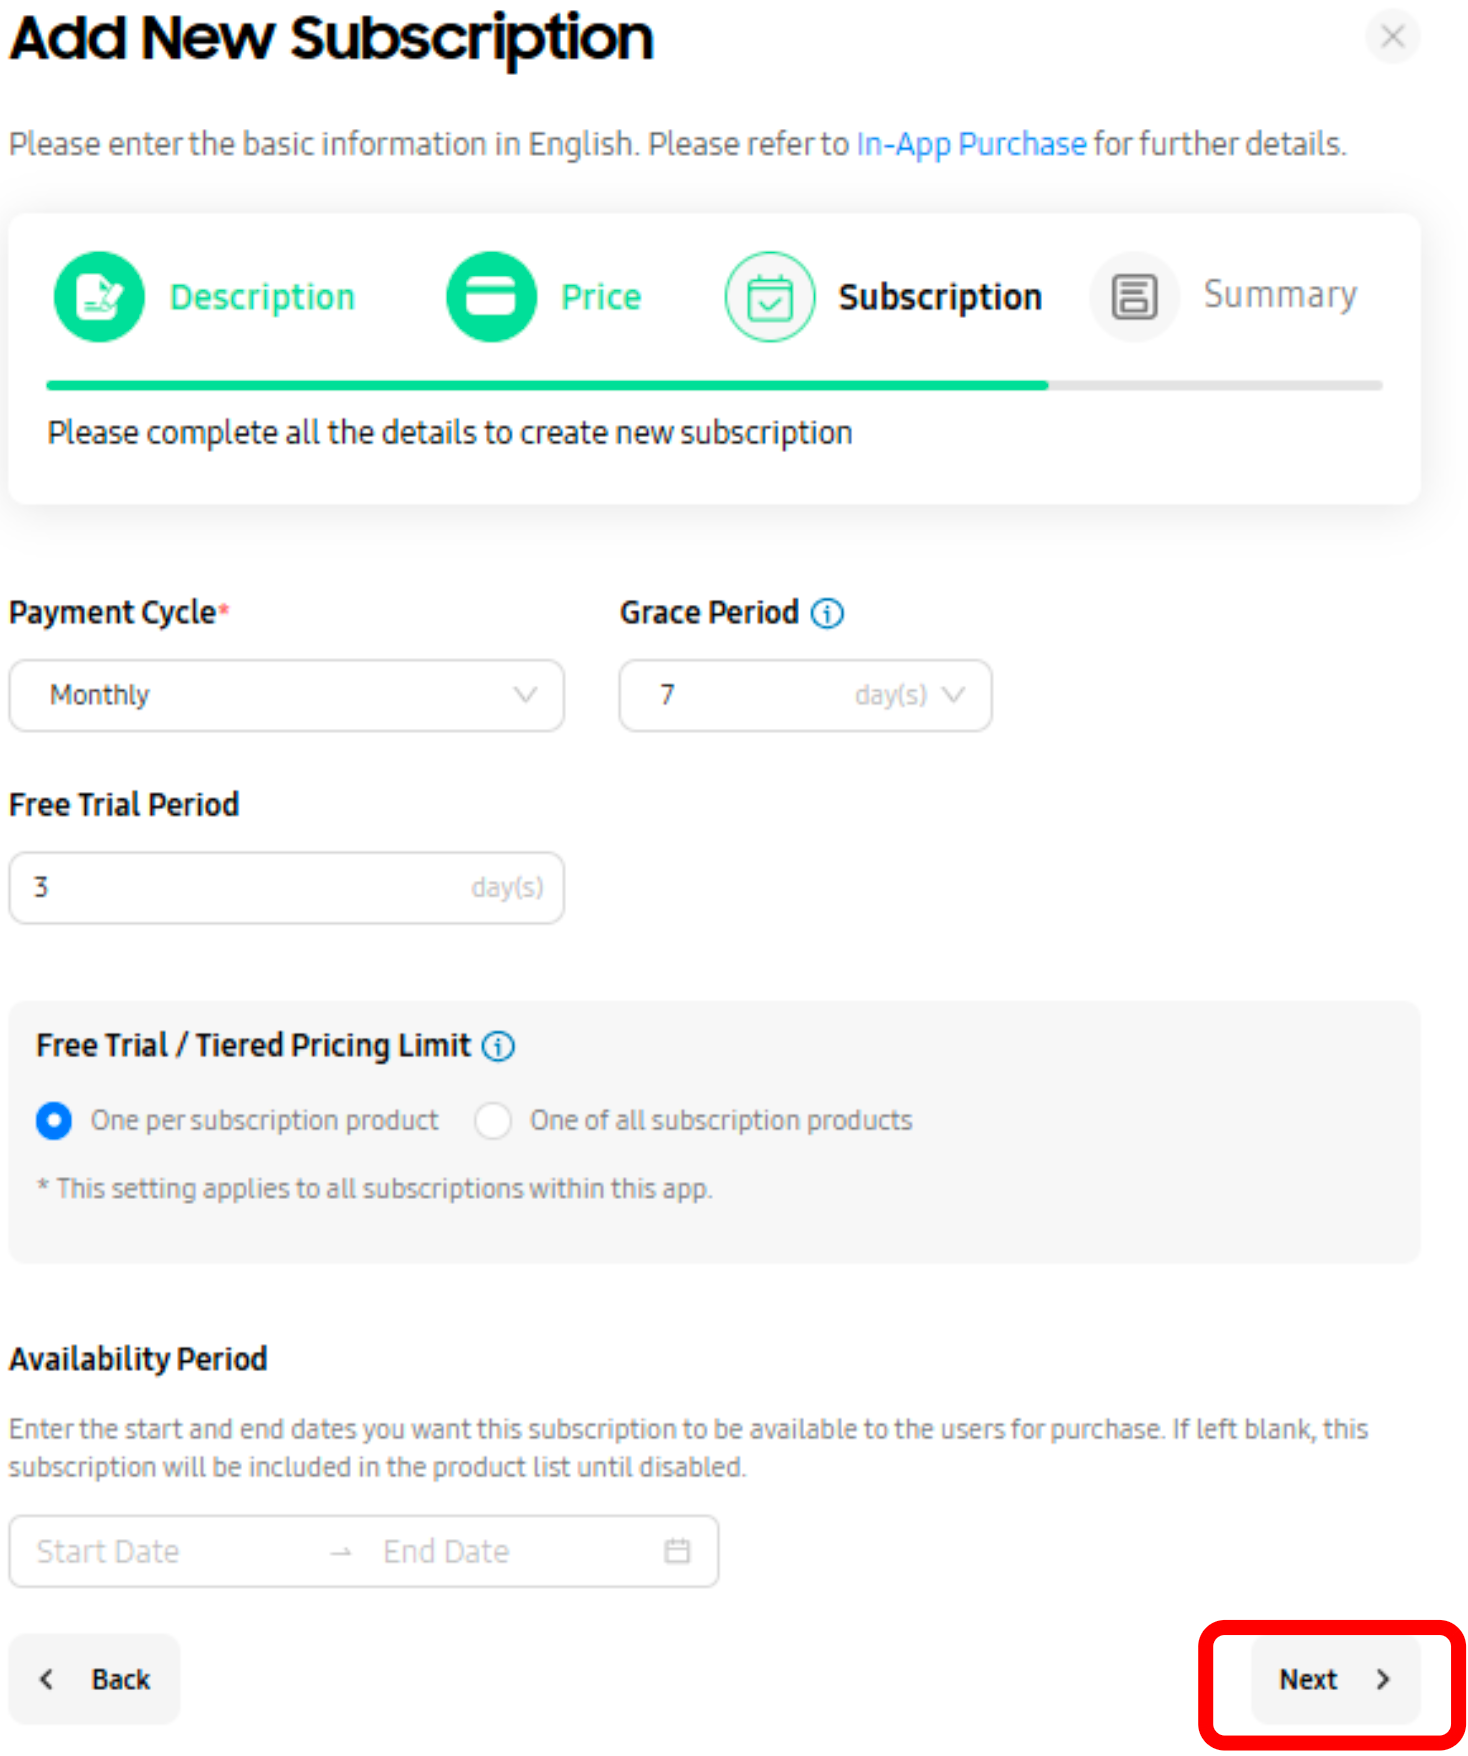
- In the Summary tab, review the subscription information and click Save.
- The subscription is added to the IAP items list in an inactive state. Select the item and click Activate.
Once your items are created and activated, add them to your RevenueCat product catalog by following the Galaxy Store product setup guide.
8. Complete the Data Safety section
- In the Data Safety tab, select the data the app collects and whether data is shared. Based on your answers, you'll need to provide additional information.
- Because Samsung In-App Purchase is enabled, select Device or other IDs in the Data Collected section.
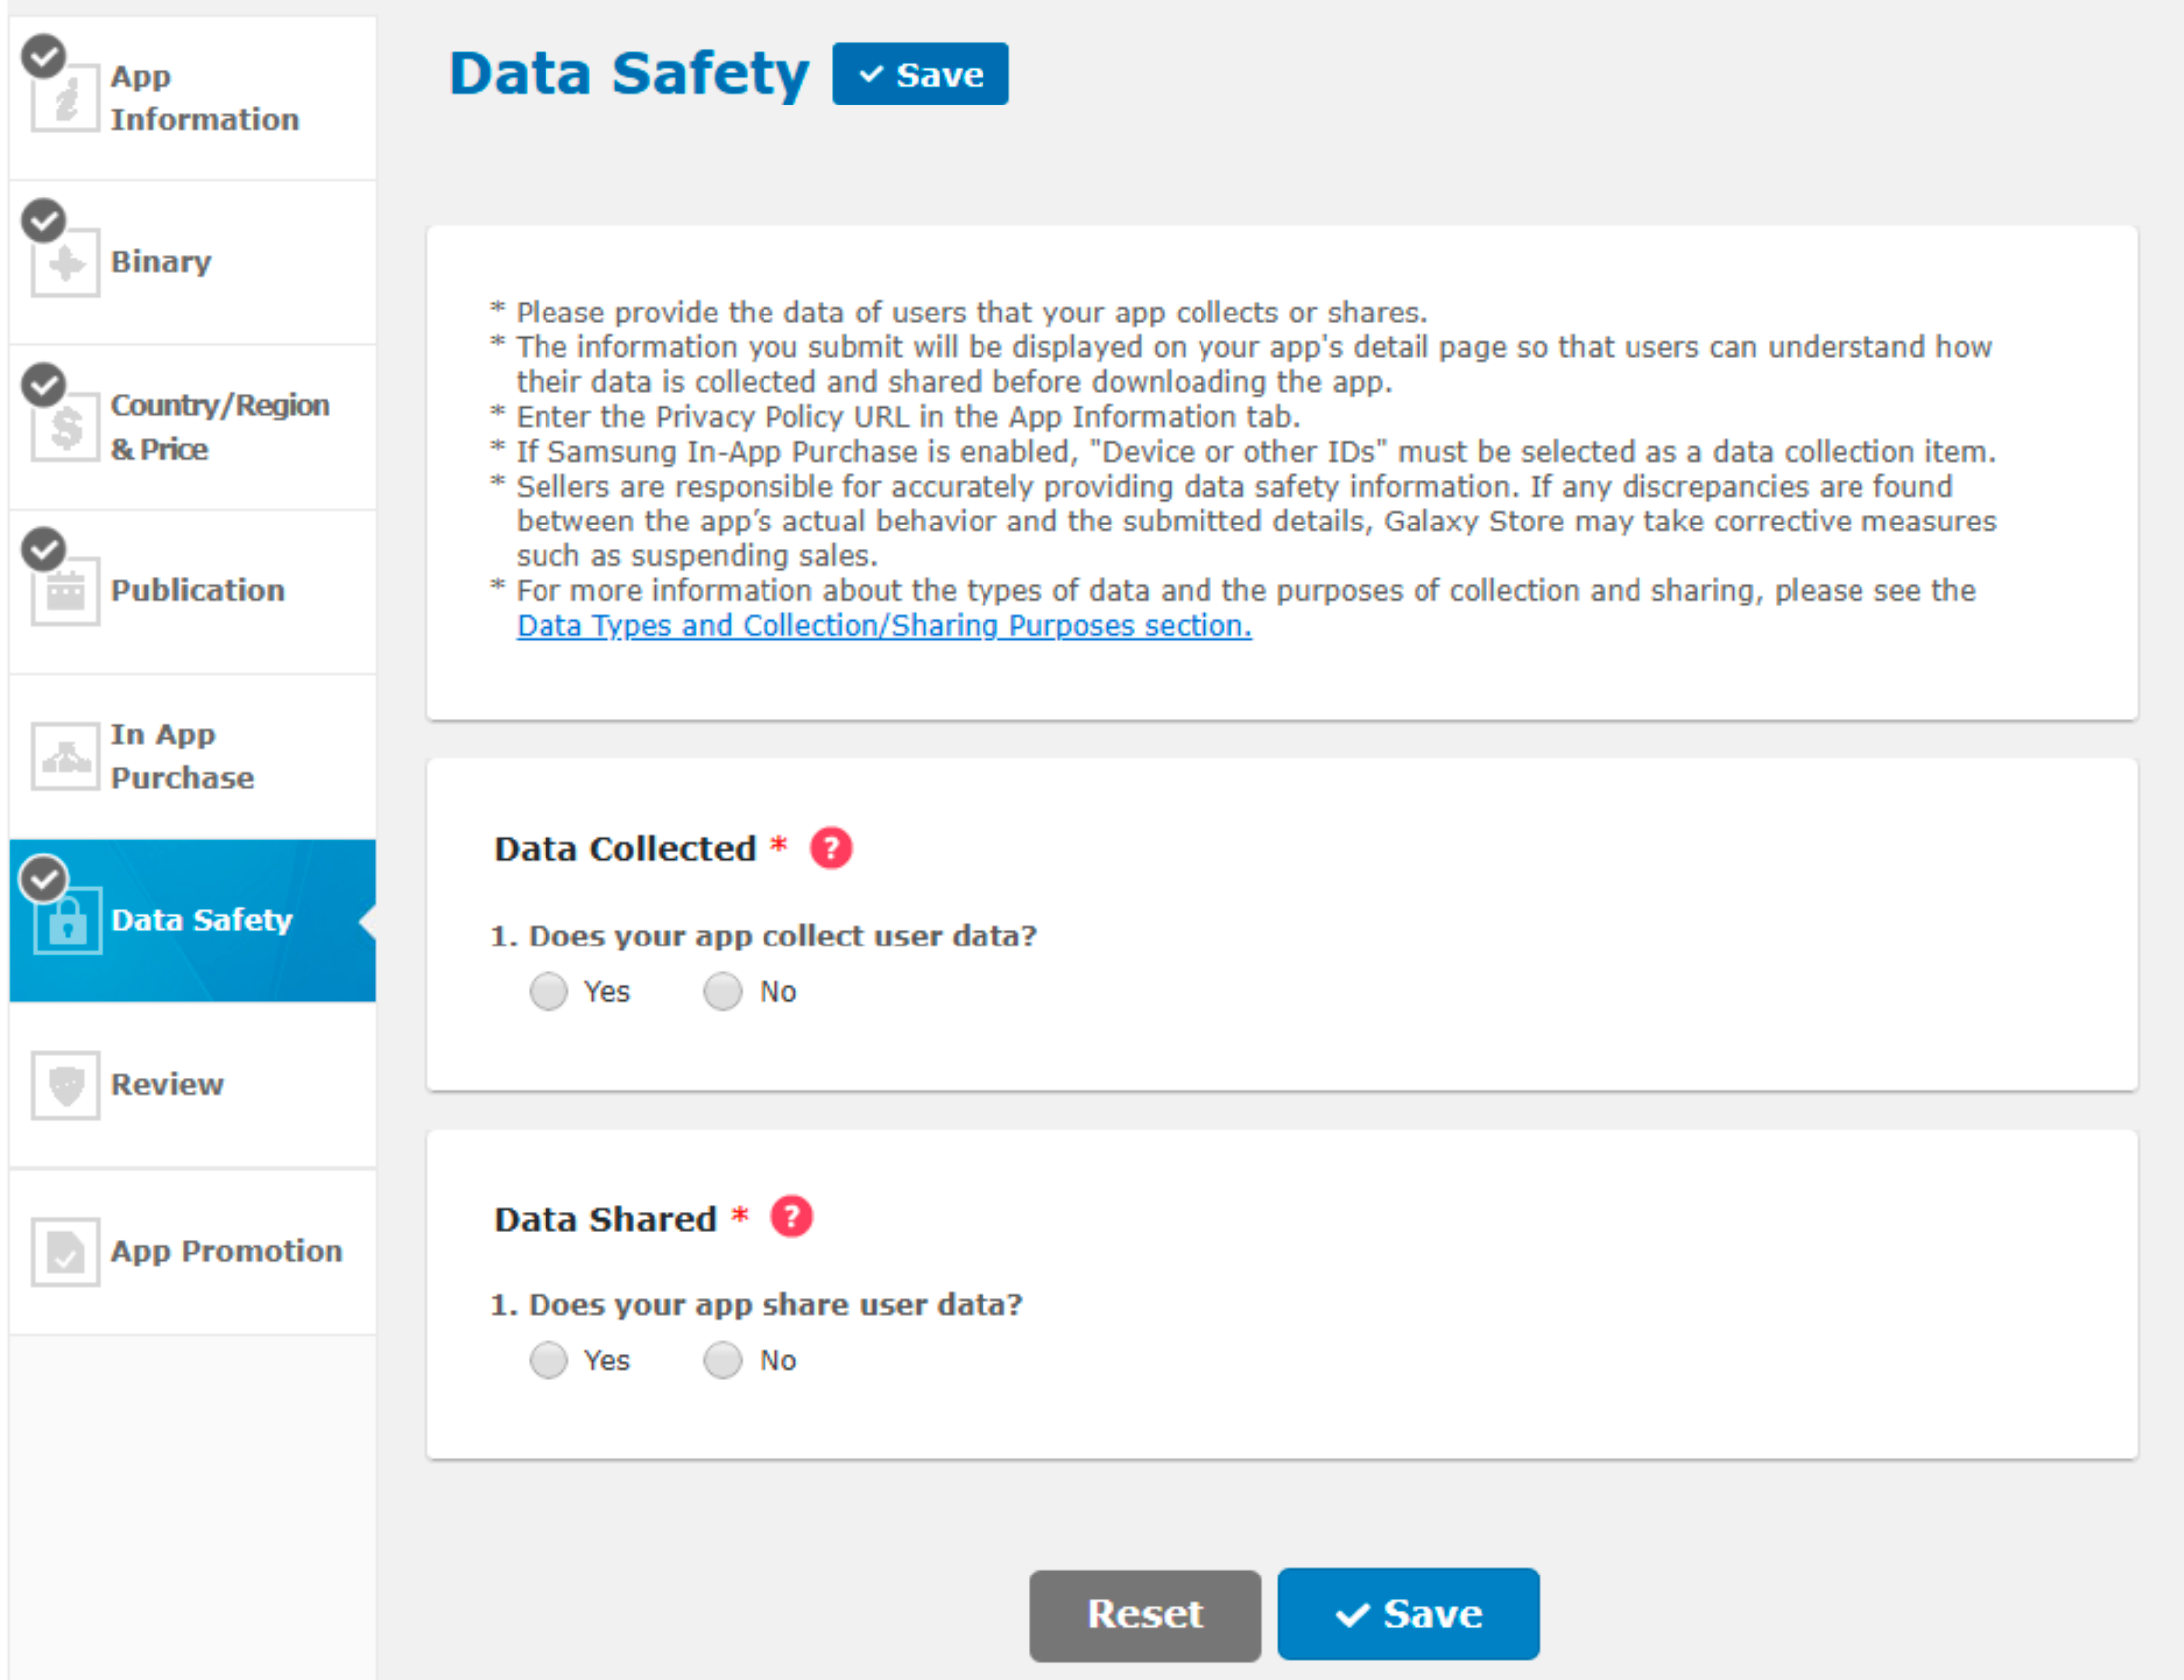
- Click Save.
9. Submit your app
- Once all required information is provided in the App Information, Binary, Country/Region & Price, Publication, In App Purchase, and Data Safety sections, click Submit and confirm the submission.
Optional services and features
Galaxy Store Developer API
The Galaxy Store Developer API lets you manage app and content updates remotely via REST API, access Galaxy Store Statistics (GSS) data, view in-app purchase payments and refunds, and manage in-app purchase products and subscriptions.
Install referrer support
The following mobile measurement partners (MMPs) support the Galaxy Store. Depending on which MMP you use, you may need to separately import its install referrer support:
| MMP | Referrer support |
|---|---|
| AppsFlyer | Automatically included in the SDK starting with v6.1.1 |
| Adjust | Manual import required |
| Branch | Manual import required |
| Singular | Manual import required |
| Kochava | Manual import required |
For more information, see Samsung's install referrer documentation.
Beta testing
The Galaxy Store has two types of beta releases, which you can configure in the Binary tab:
- Closed Beta, which supports in-app purchases
- Open Beta
Manager accounts
Once you've created an account, you can invite other team members to access aspects of your account as managers: Order Manager, Application Manager, Accounting Manager, Statistics Manager, Buyer Comments Manager, and Promotion Manager. Manager accounts can register as private accounts and don't require a D-U-N-S Number.
Next steps
Now that your app is in the Galaxy Store, connect it to RevenueCat:
- Connect the Galaxy Store to RevenueCat — Create your app in RevenueCat and connect it with a Seller Portal service account
- Create products in RevenueCat — Add your Galaxy Store in-app purchases to your RevenueCat product catalog
- Add the SDK to your app — Install the RevenueCat SDK with Galaxy Store support for Android or React Native